> For the complete documentation index, see [llms.txt](https://docs.helmut.cloud/llms.txt). Markdown versions of documentation pages are available by appending `.md` to page URLs; this page is available as [Markdown](https://docs.helmut.cloud/high5/developing-nodes-with-nodekit.md).
# Developing nodes with NodeKit
## Getting Started Guide
This guide will take you step-by-step through the process of building and publishing your first node catalog, from start to finish.
### **What is NodeKit?**
NodeKit provides all the essential tooling, UI components, helper classes, and documentation needed to develop, test, and distribute node catalogs in [helmut.cloud](http://helmut.cloud).
You can create nodes using TypeScript, leveraging the ever-growing universe of Node.js packages to develop sophisticated and feature-rich node catalogs.
NodeKit simplifies the process of building, testing, and publishing your node catalog, making it readily available for use within the High5 Stream Designer Studio
#### Prerequisites:
* A GitHub account
* A [helmut.cloud](http://helmut.cloud/) account
* The [helmut.cloud](http://helmut.cloud/) agent version 1.2.0 or newer installed and running
#### Recommendations:
* Visual Studio Code
### 1. Create a new repo from the wave-node-catalog-blueprint template:
First things first, let’s create a new repo in your GitHub account using the official Wave Node Catalog Blueprint. This blueprint is packed with goodies: sample code, GitHub Actions for building and publishing, linting rules, and much more. 🎩✨
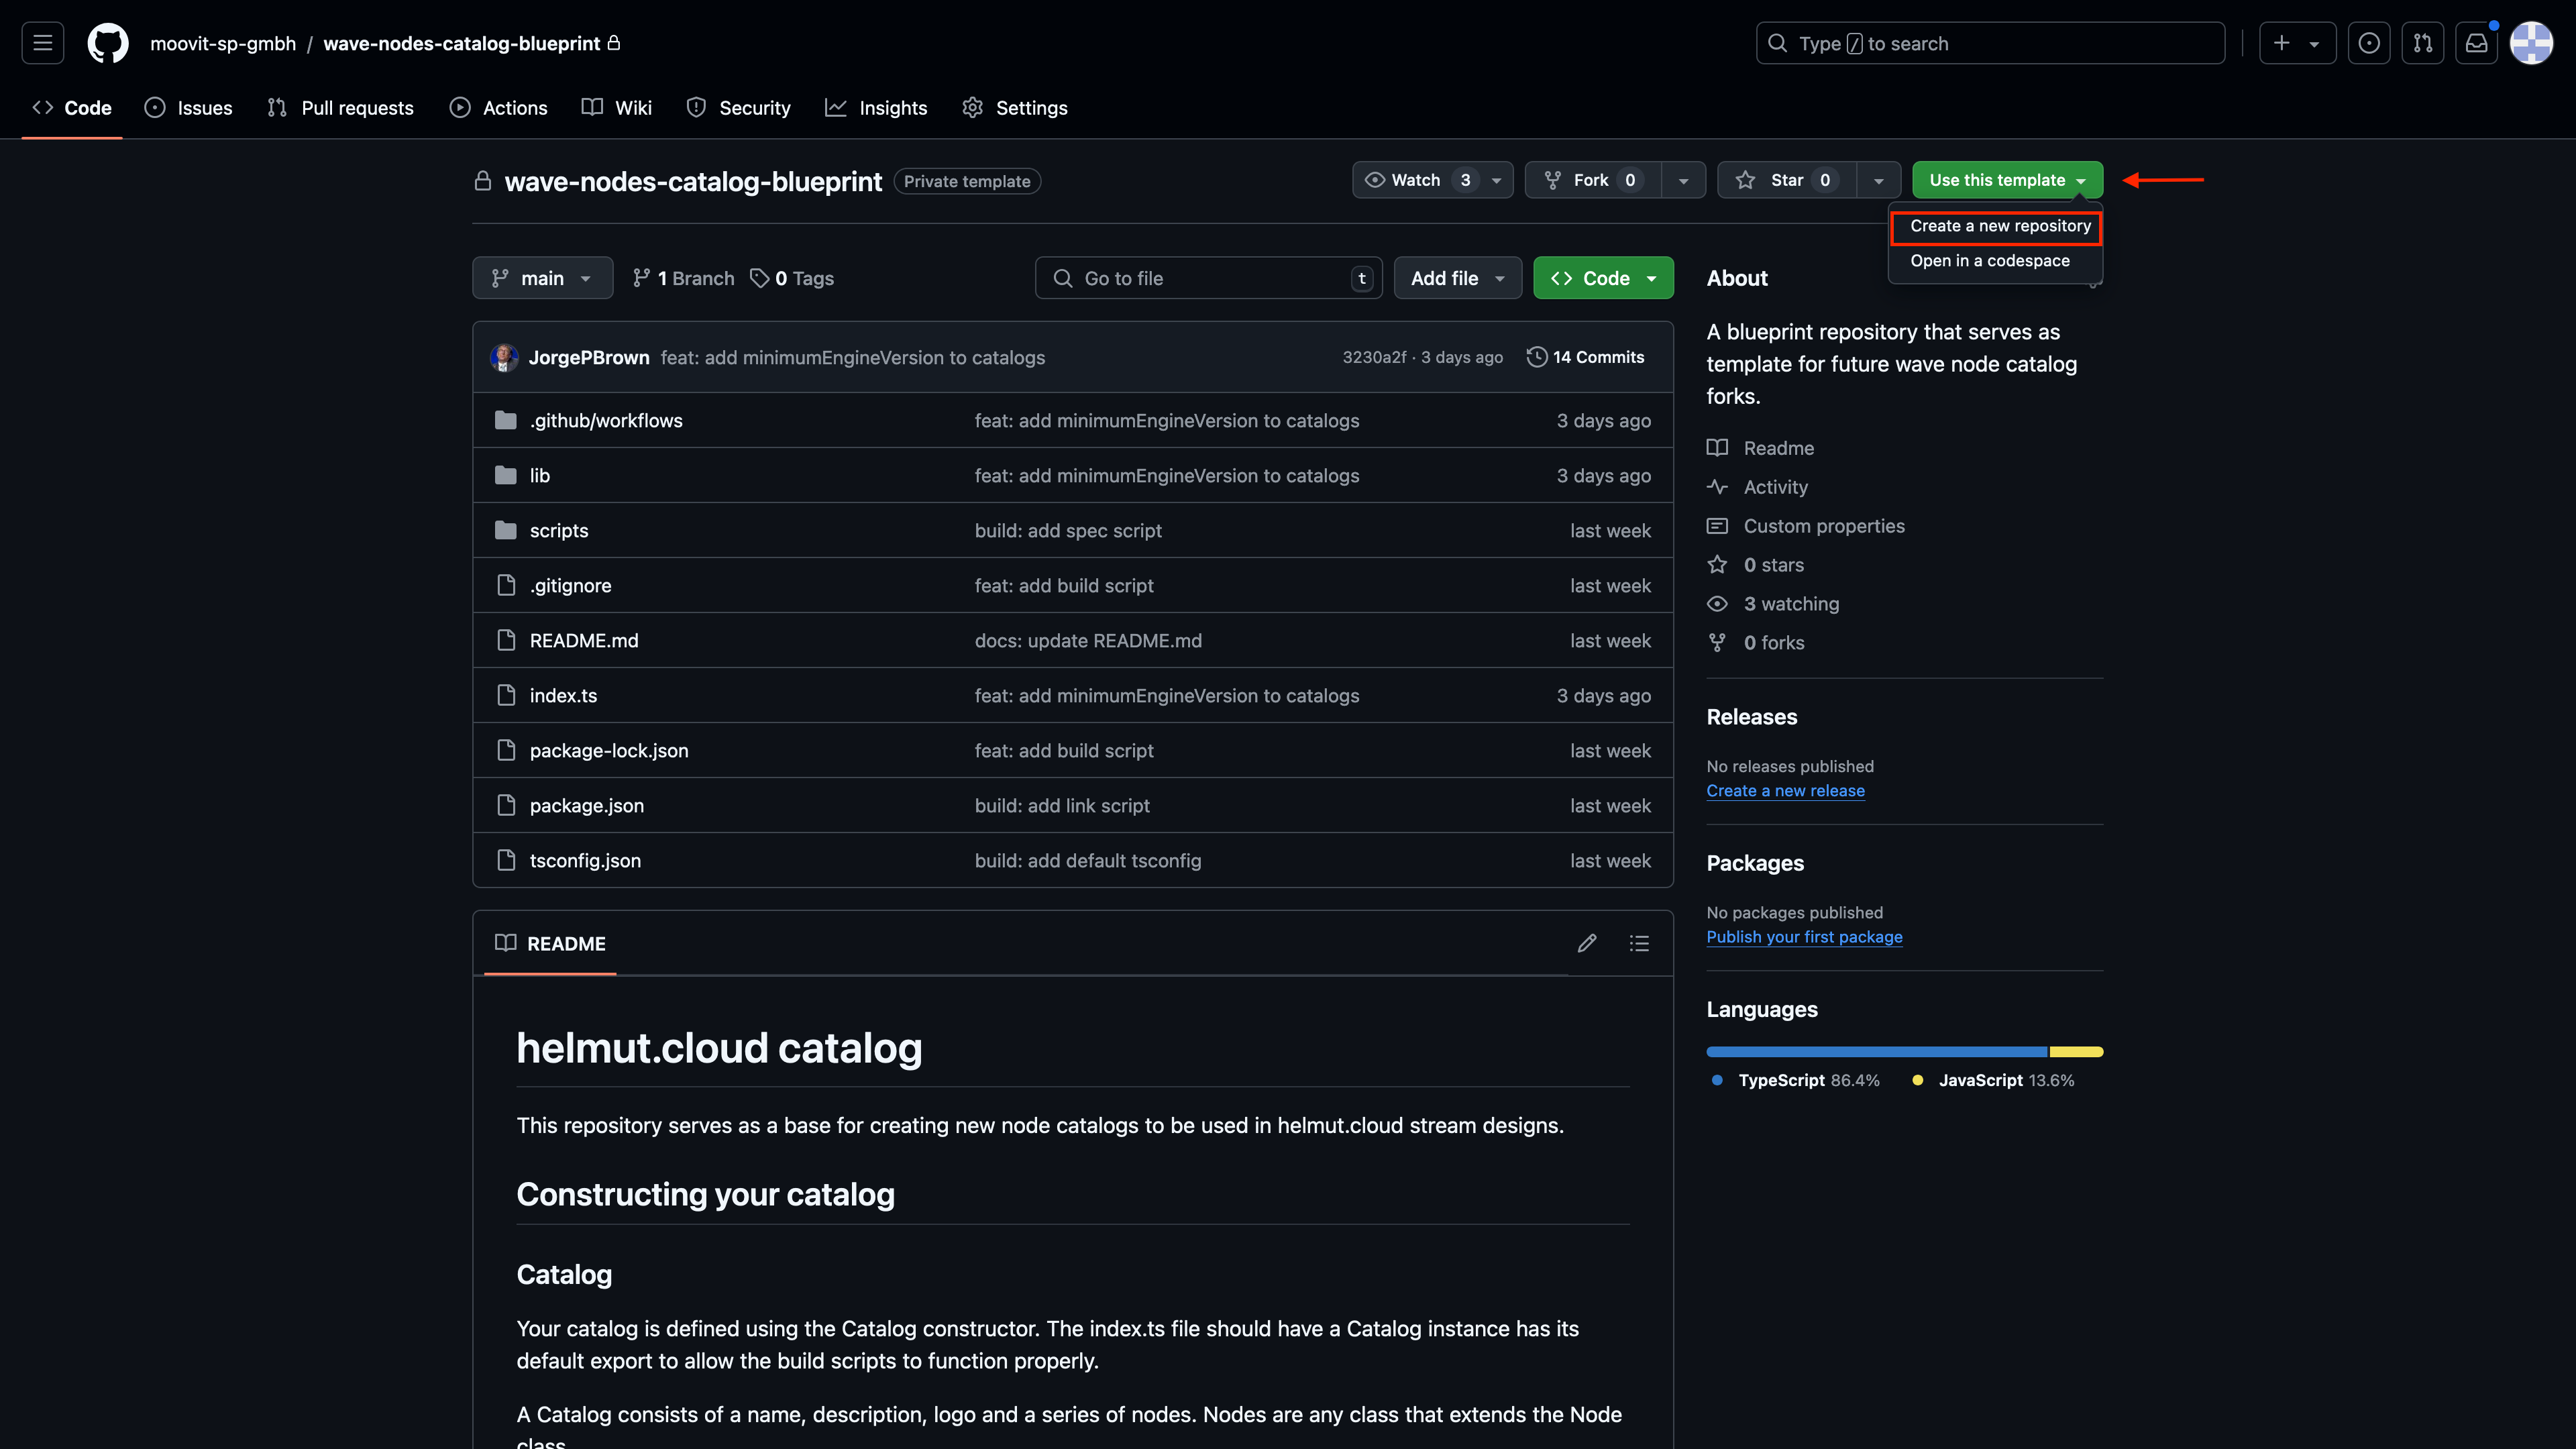
1. Head over to [wave-nodes-catalog-blueprint](https://github.com/moovit-sp-gmbh/wave-nodes-catalog-blueprint) on GitHub, click "**Use this template**," then "**Create a new repository**."
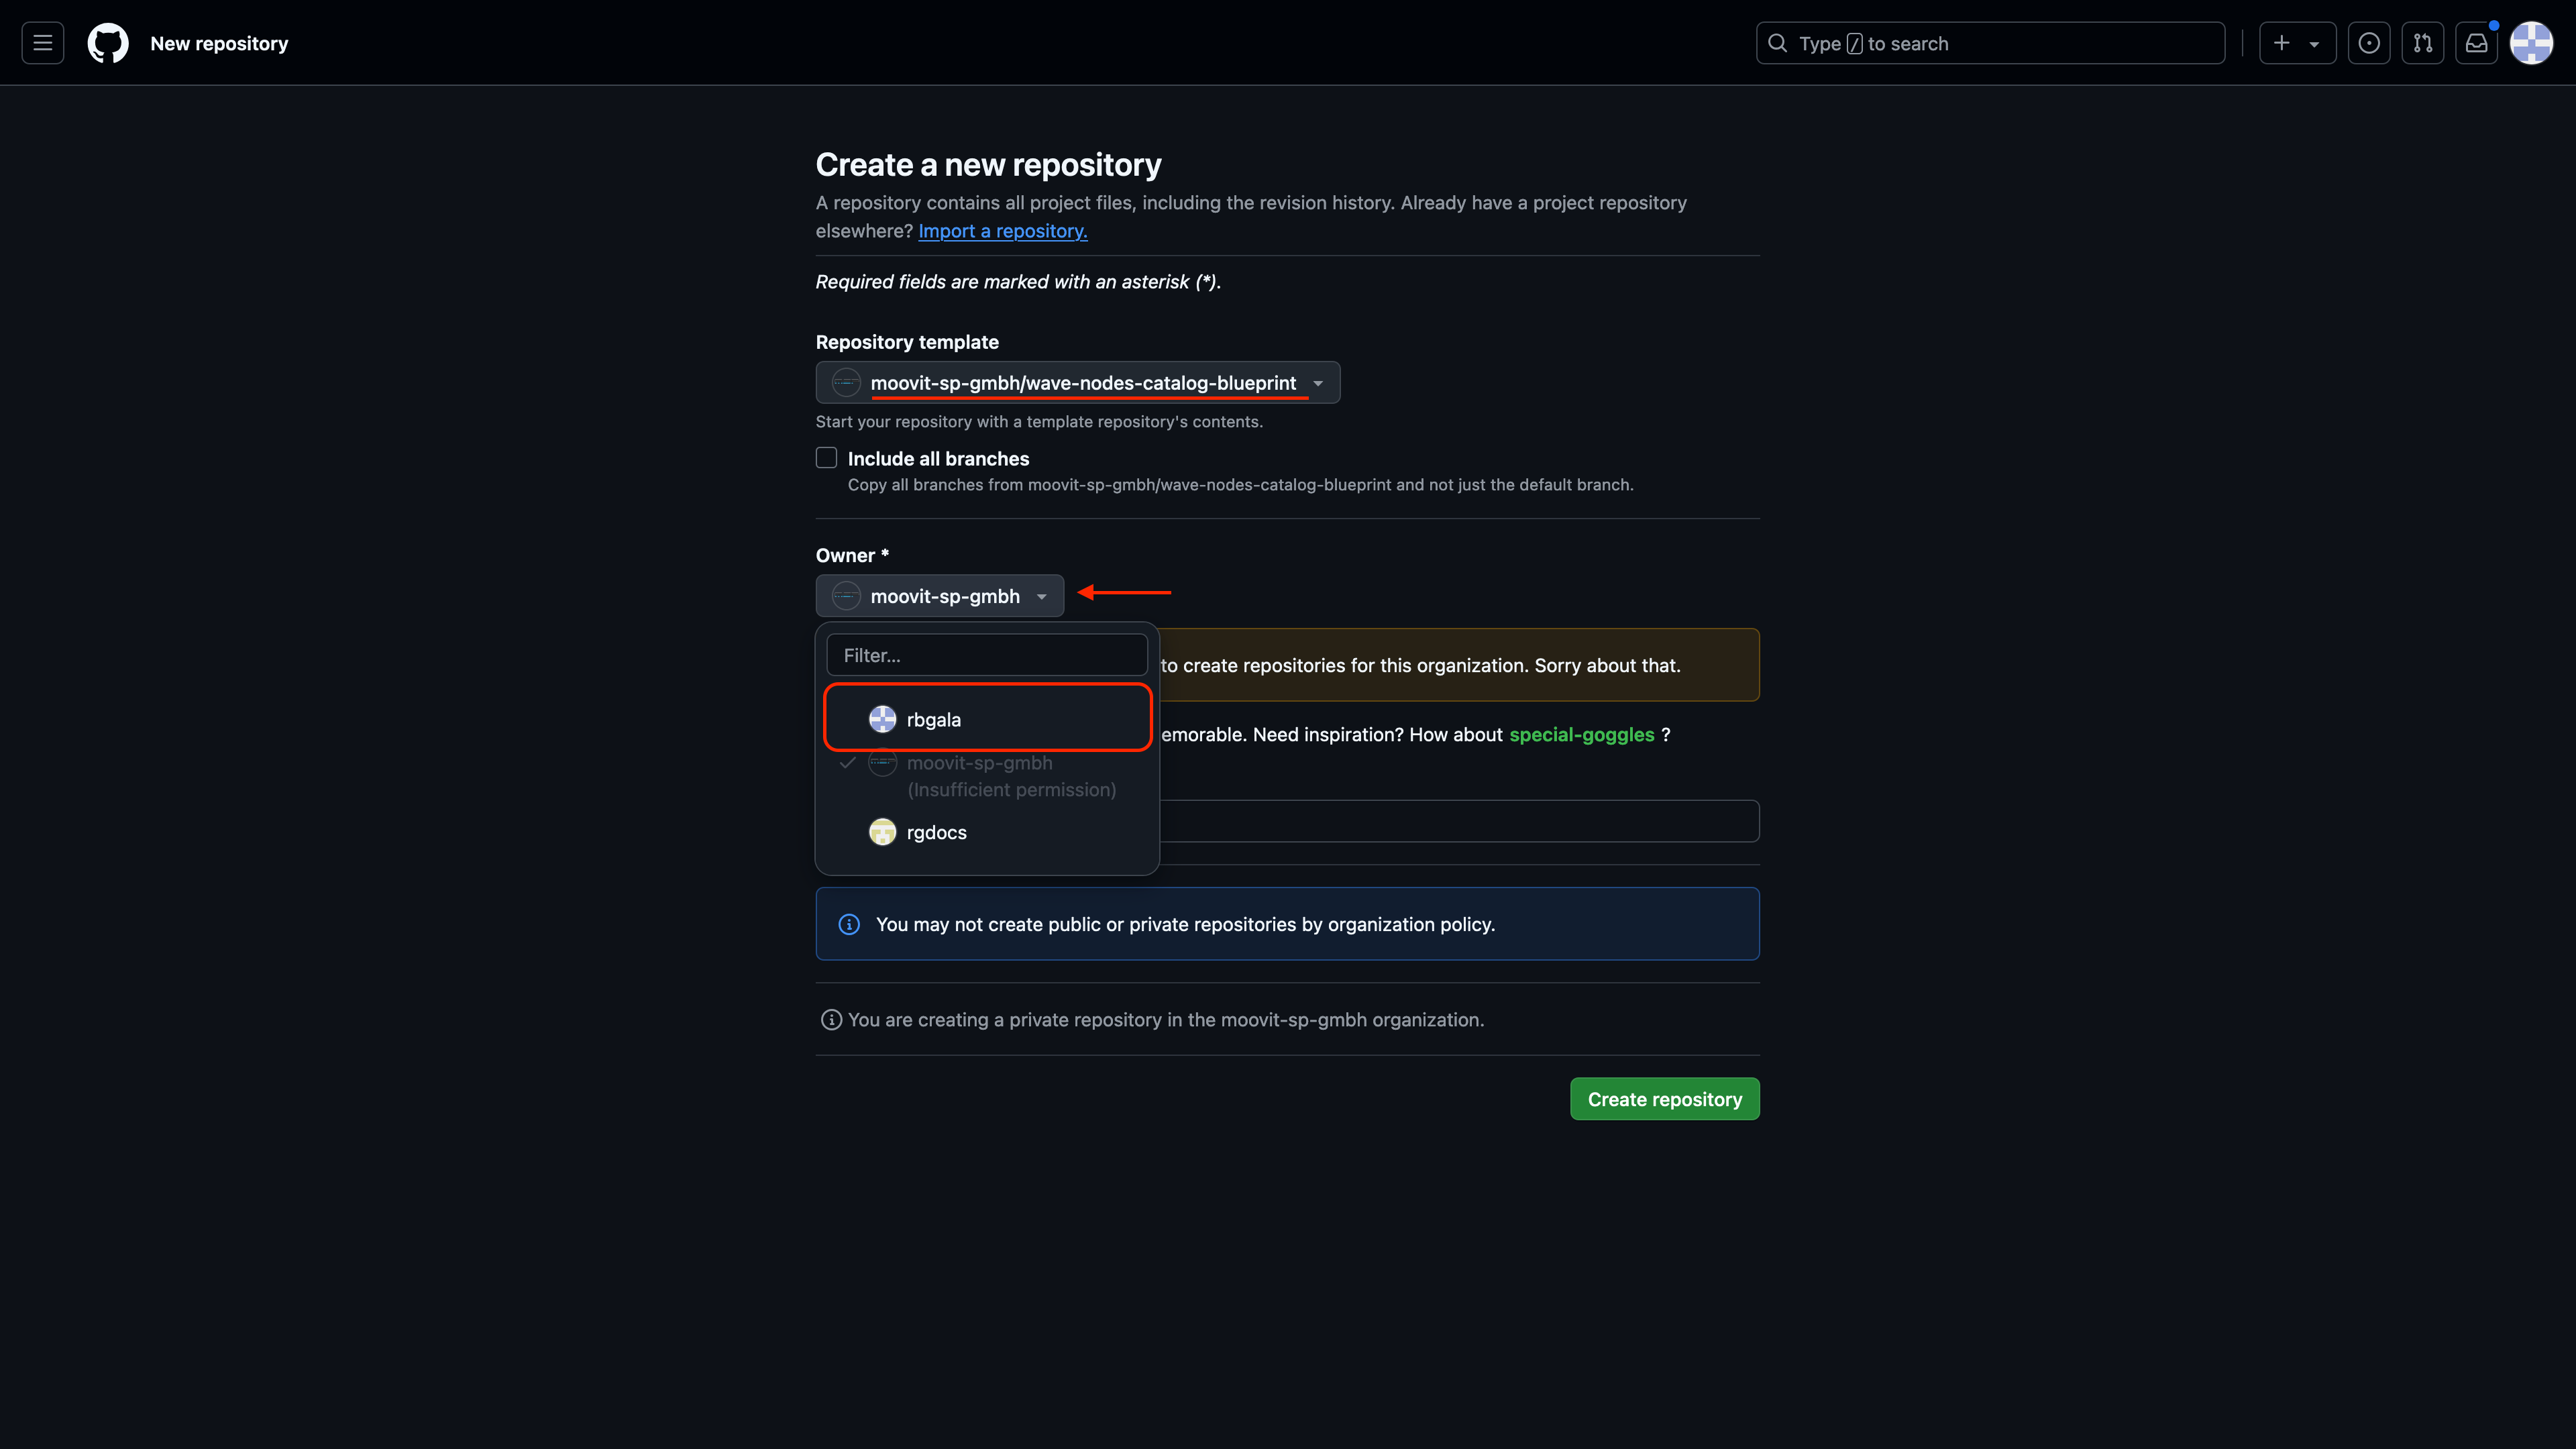
2. On the "**Create new repository**" page, ensure "**Repository template**" is set to **"moovit-sp-gmbg/wave-nodes-catalog-blueprint"**, and set the owner to your account.
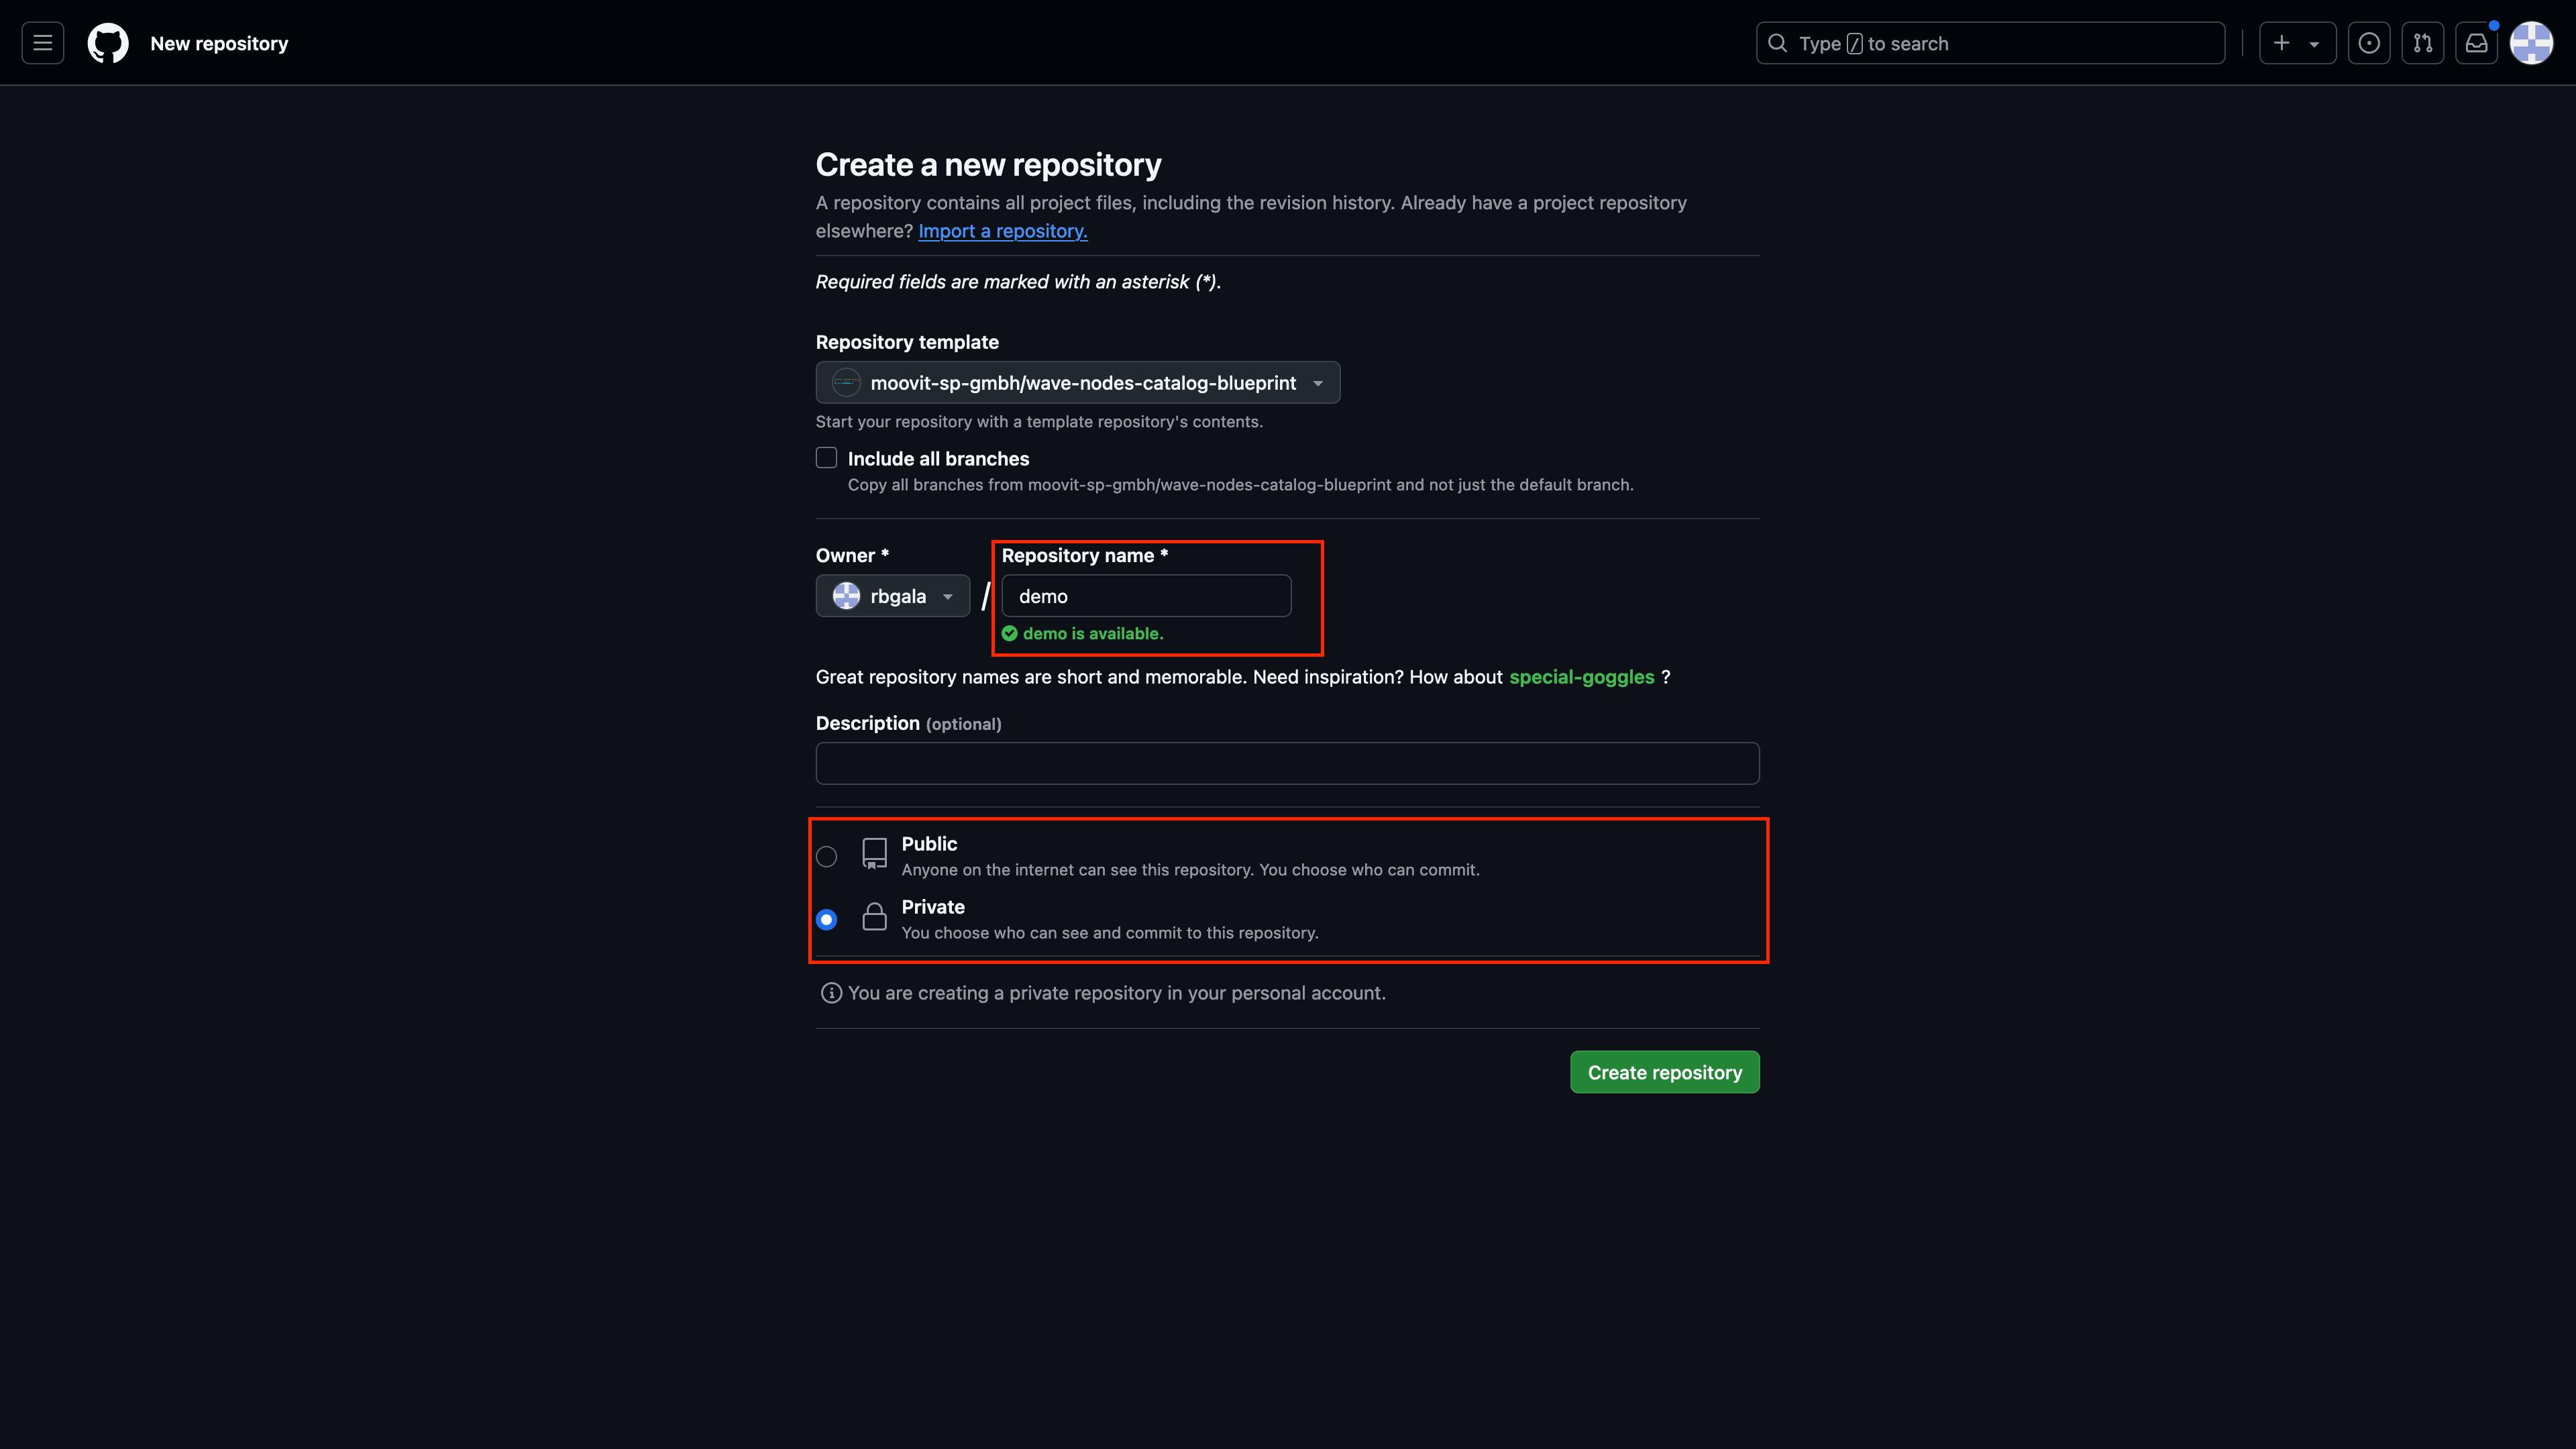
3. Give your repository a name, set the visibility (public or private), and hit "**Create repository**"
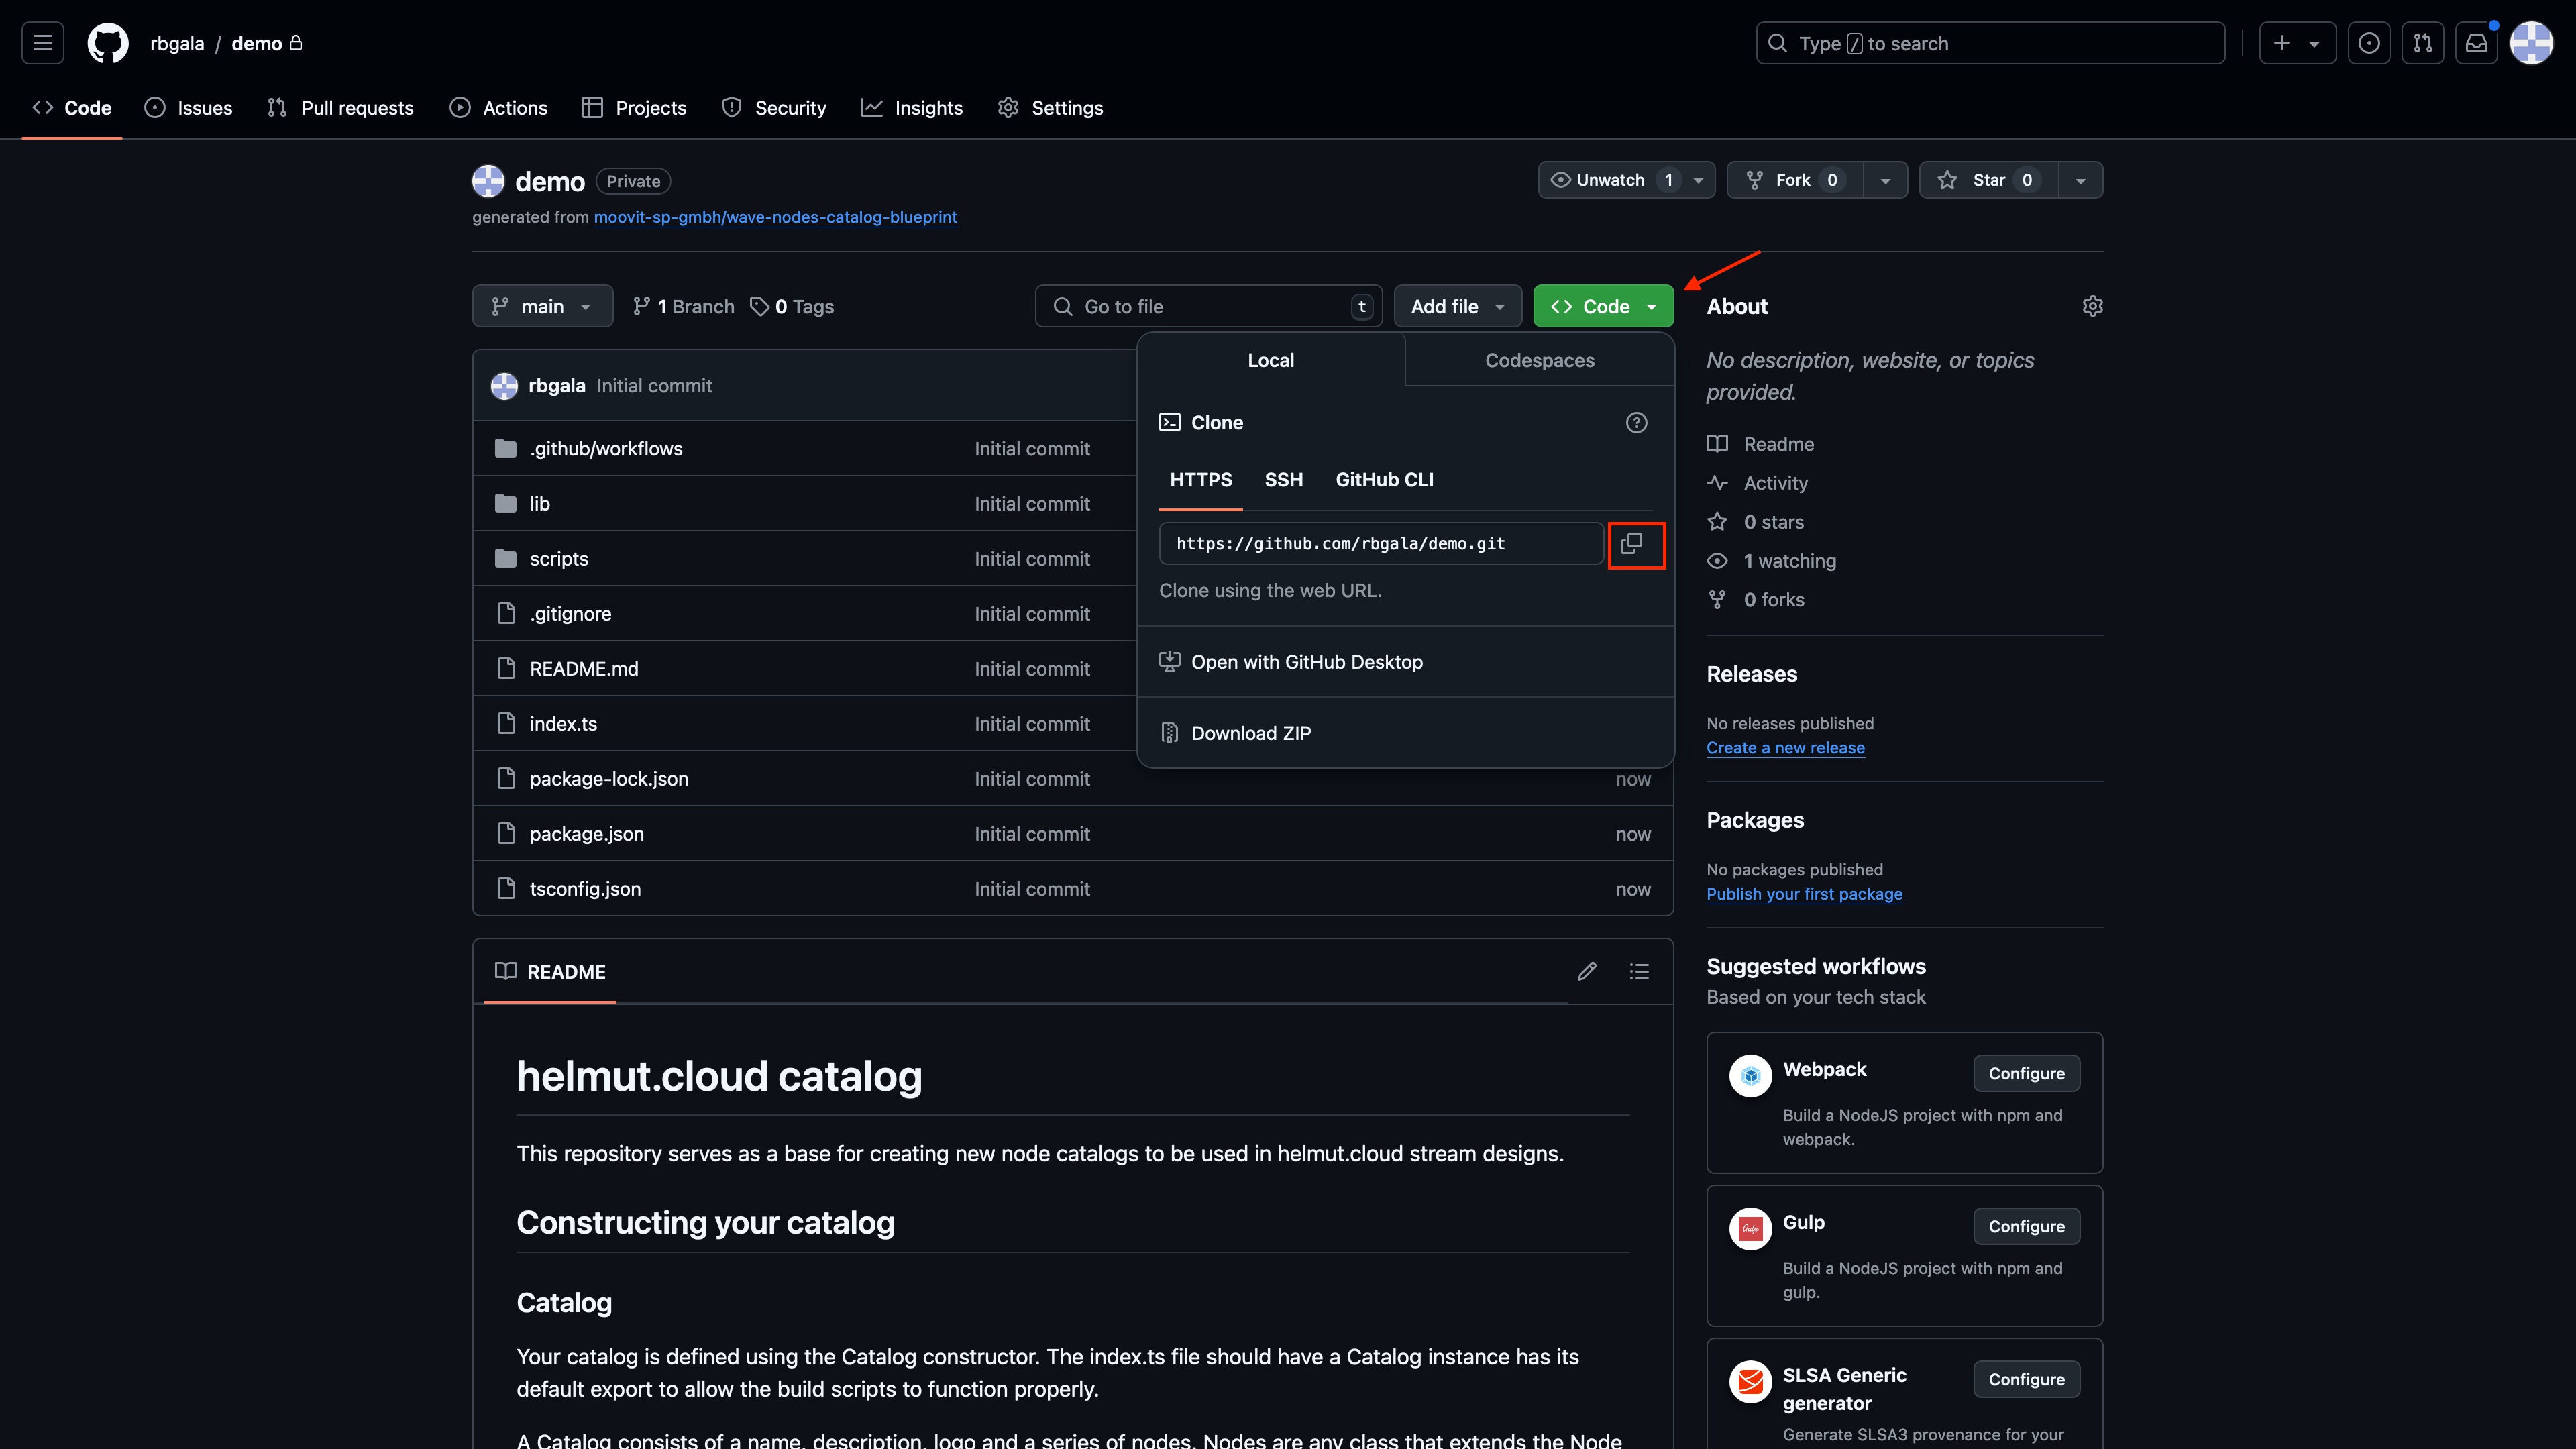
4. Once your repo is ready, click the "Code" dropdown and copy the HTTPS link. You'll need it for the next step
### 2. Code and Test:
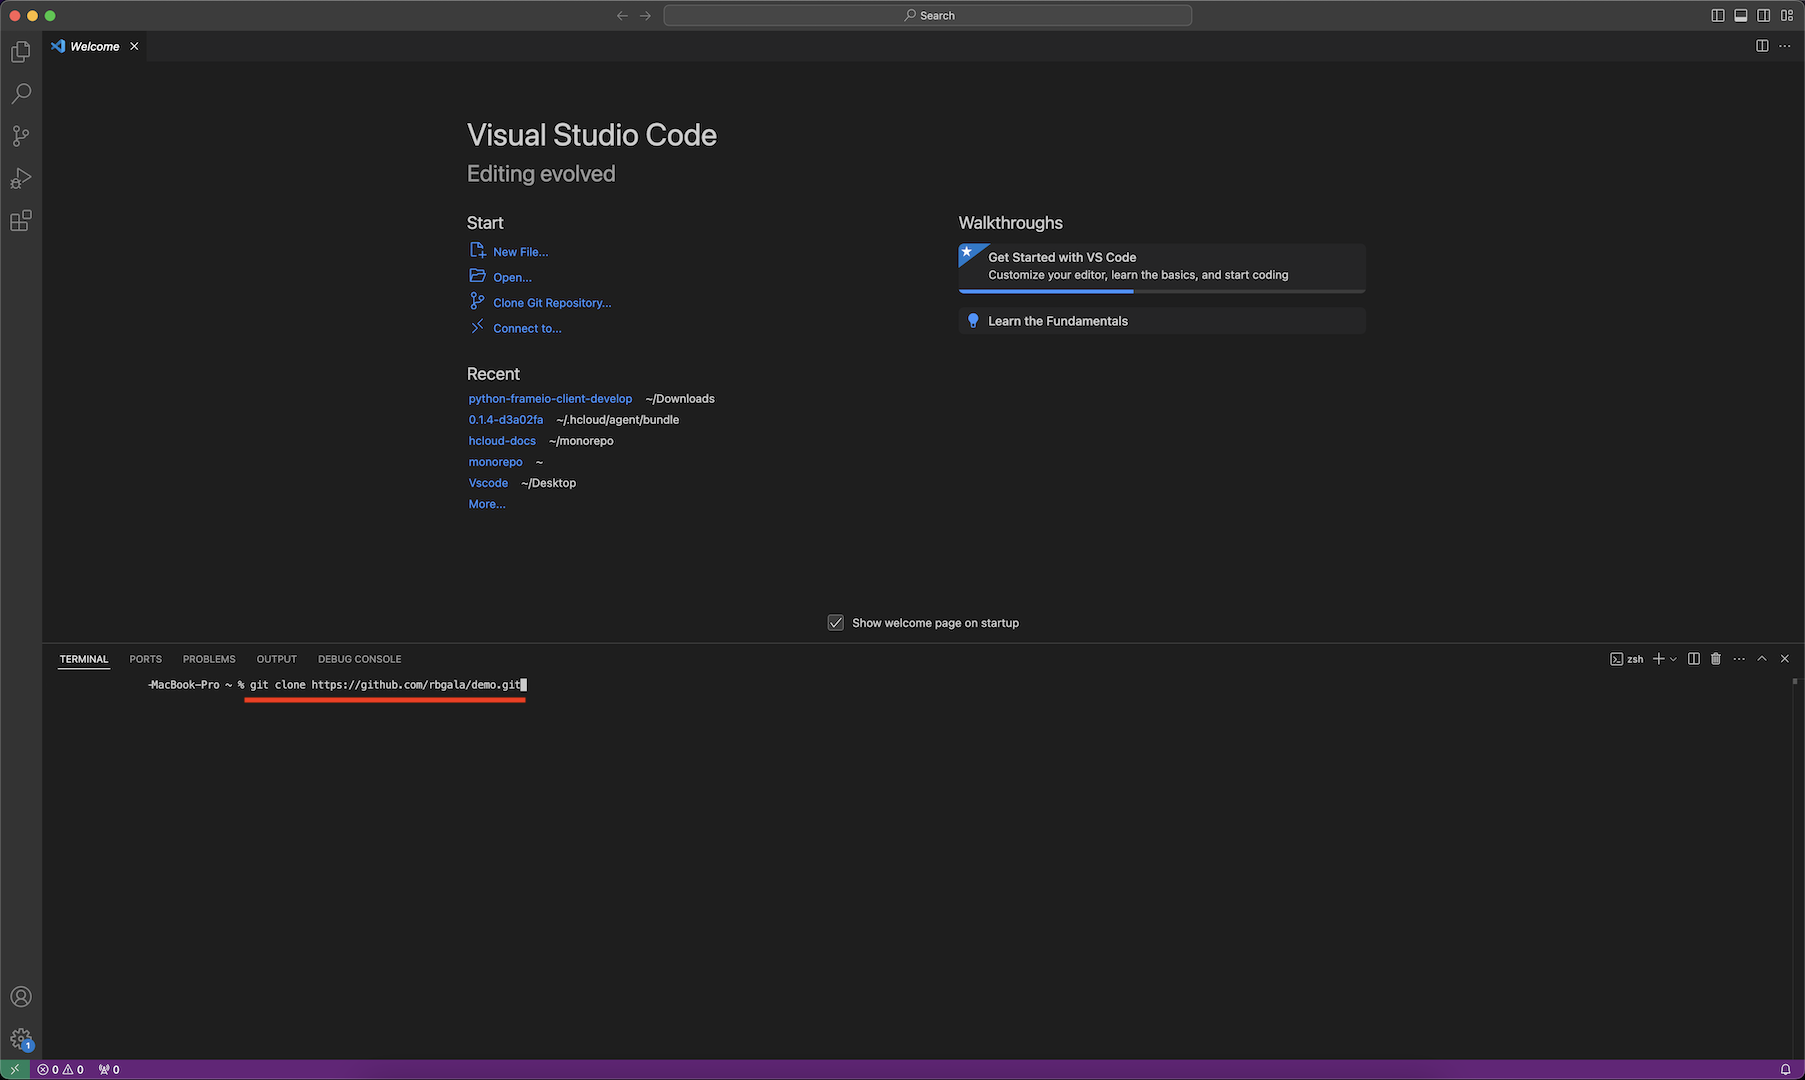
1. Now it's time to dive into the fun part, coding! 🧑💻 Grab the HTTPS link from your new repo, open the terminal in VSCode, and paste the link to clone the repo to your local machine.
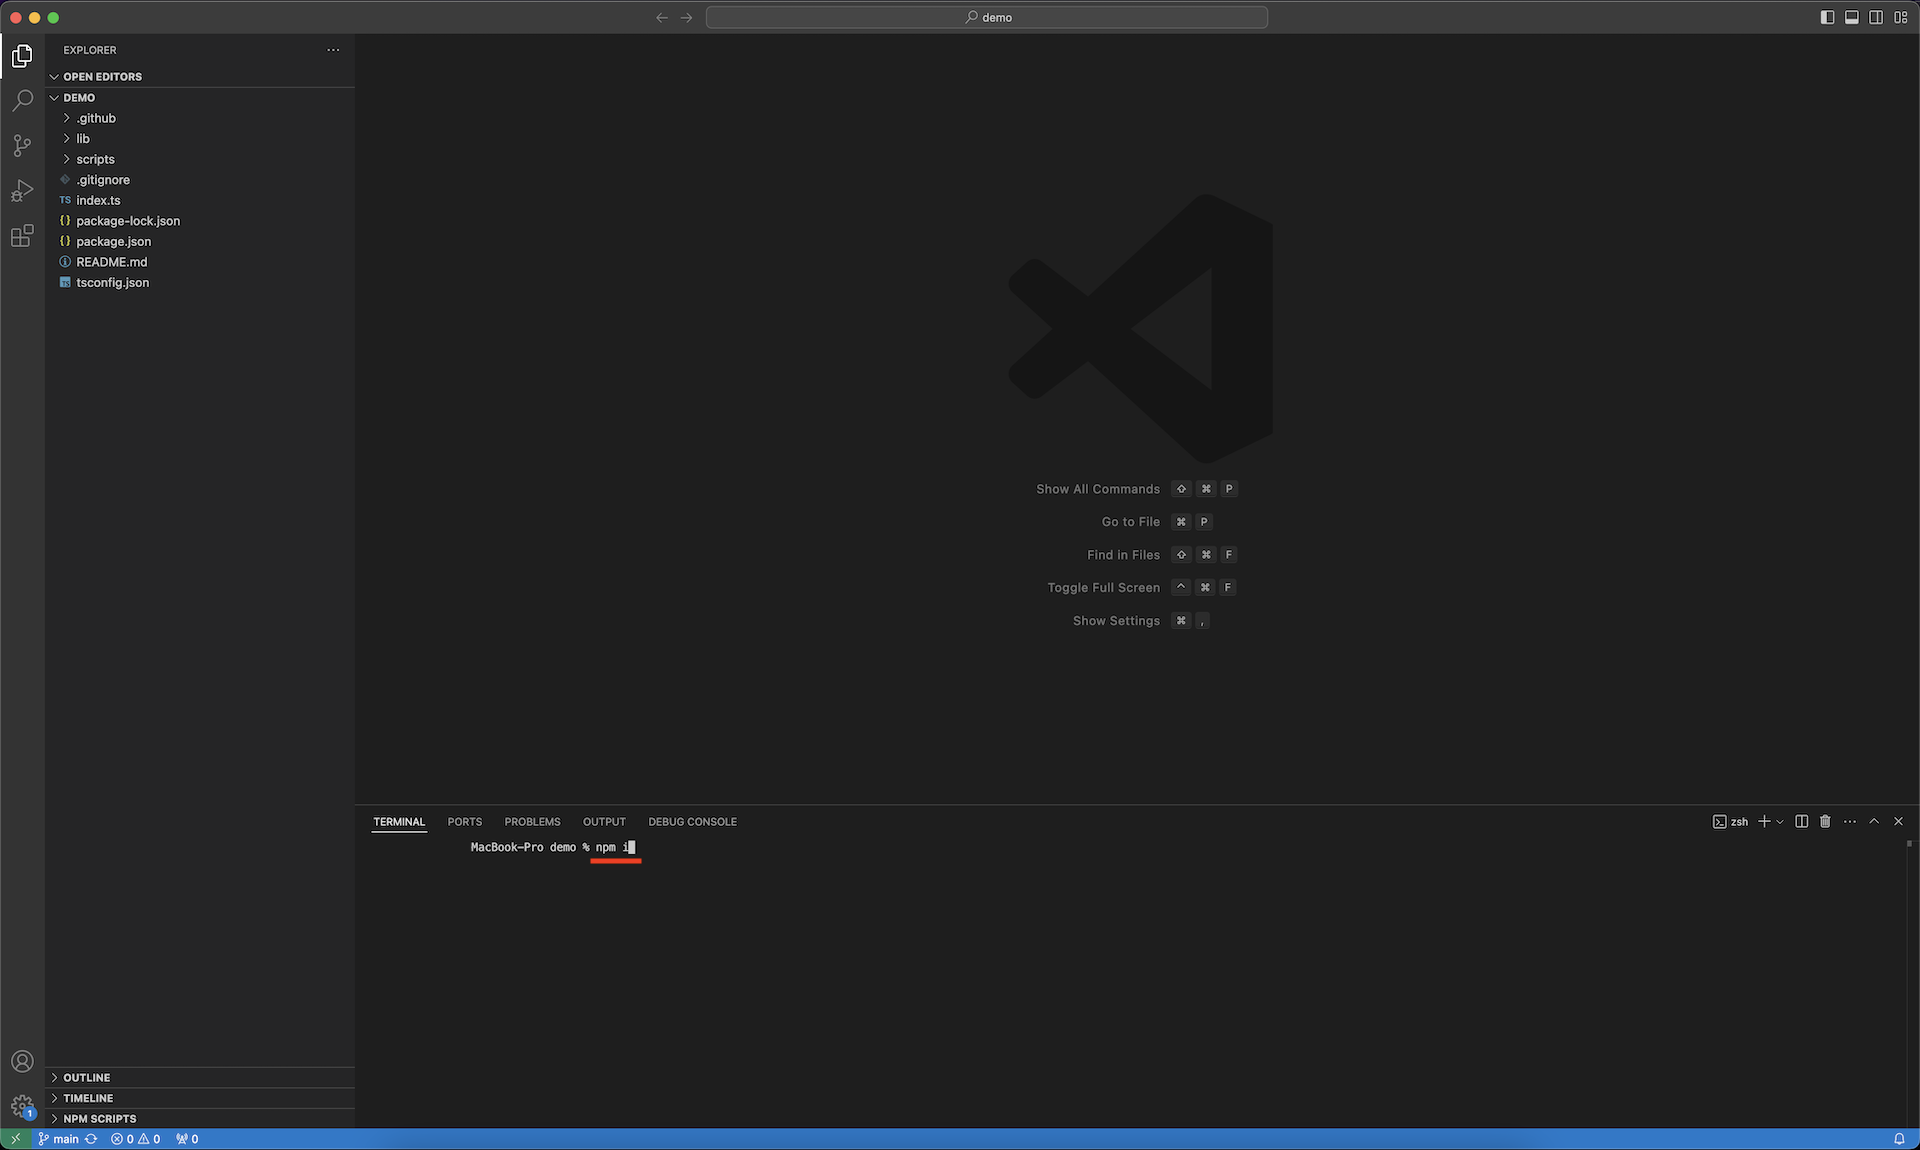
2. Once cloned, open the folder in Visual Studio Code and run: `npm i` . This will install all project dependencies from `package.json`
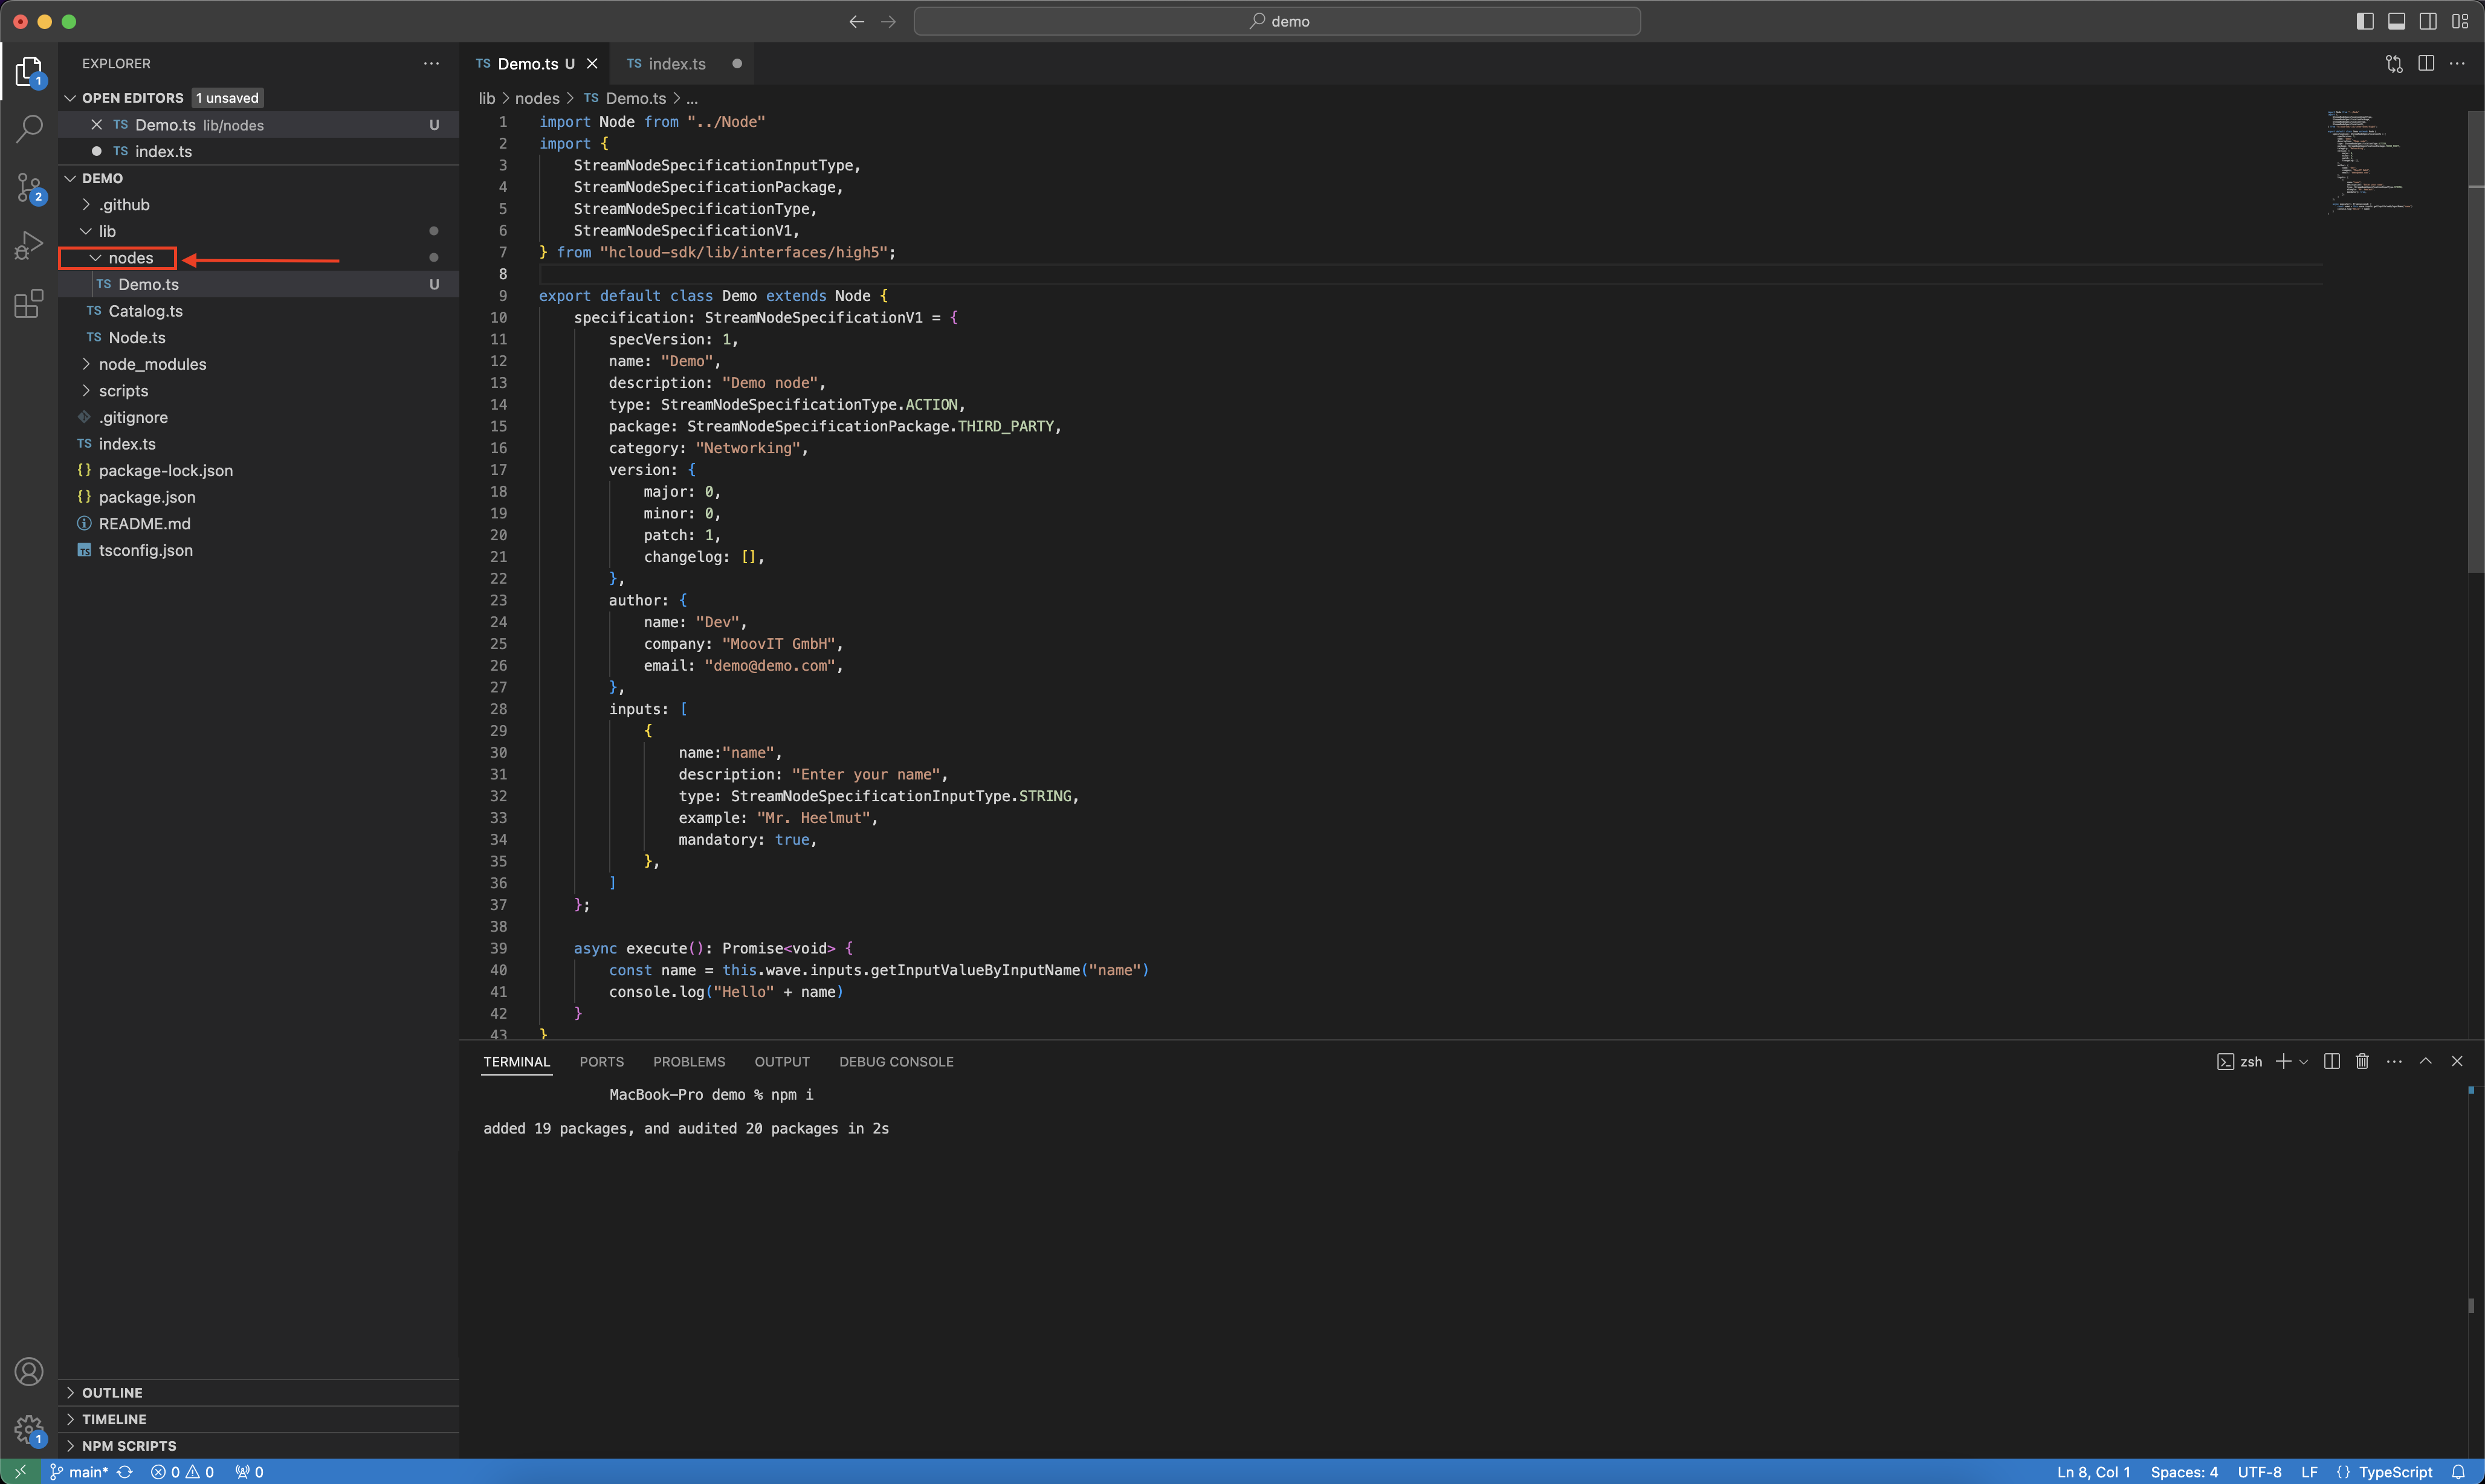
3. Once that’s done, navigate to the "**lib**" folder, expand the "**nodes**" folder, and create your first `node.ts` file. For a solid starting point, check out `HttpClient.ts` . This node serves as a blueprint for building new nodes. In this file, you can explore how to use helper classes, read inputs, set outputs, and understand how the node specification works, along with much more.
4. Once you’ve finished coding your nodes, open the `index.ts` file and import all the nodes you’ve created at the top of the file. Here’s an example:
```typescript
import Demo from "./lib/nodes/Demo";
```
5. Now it’s time to configure the catalog instance. You’ll need to provide the following details:
* **Name:** The catalog’s name, e.g., "**Microsoft Teams**"- **Description:** A brief description, e.g., "**Nodes to send messages in Microsoft Teams**"
* **Logo:** A `.webp` logo file (max size X by Y) hosted at a publicly accessible URL.
* **Wave Engine Version:** Specify the minimum version of the Wave Engine required to run your catalog.
Finally, add the nodes that should be bundled in your node catalog.
Here's an example:
```typescript
export default new Catalog(
"Demo Catalog",
"This is my first external node catalog",
"https://app.helmut.cloud/img/logo_white.webp",
"1.0.0",
Demo,
Demo2
);
```
### 3. Test your node:
Testing your nodes couldn’t be easier, and the best part? You don’t even need to publish them first. Pretty awesome, right? 😎\
\
Once you’re happy with your code, just follow these steps:
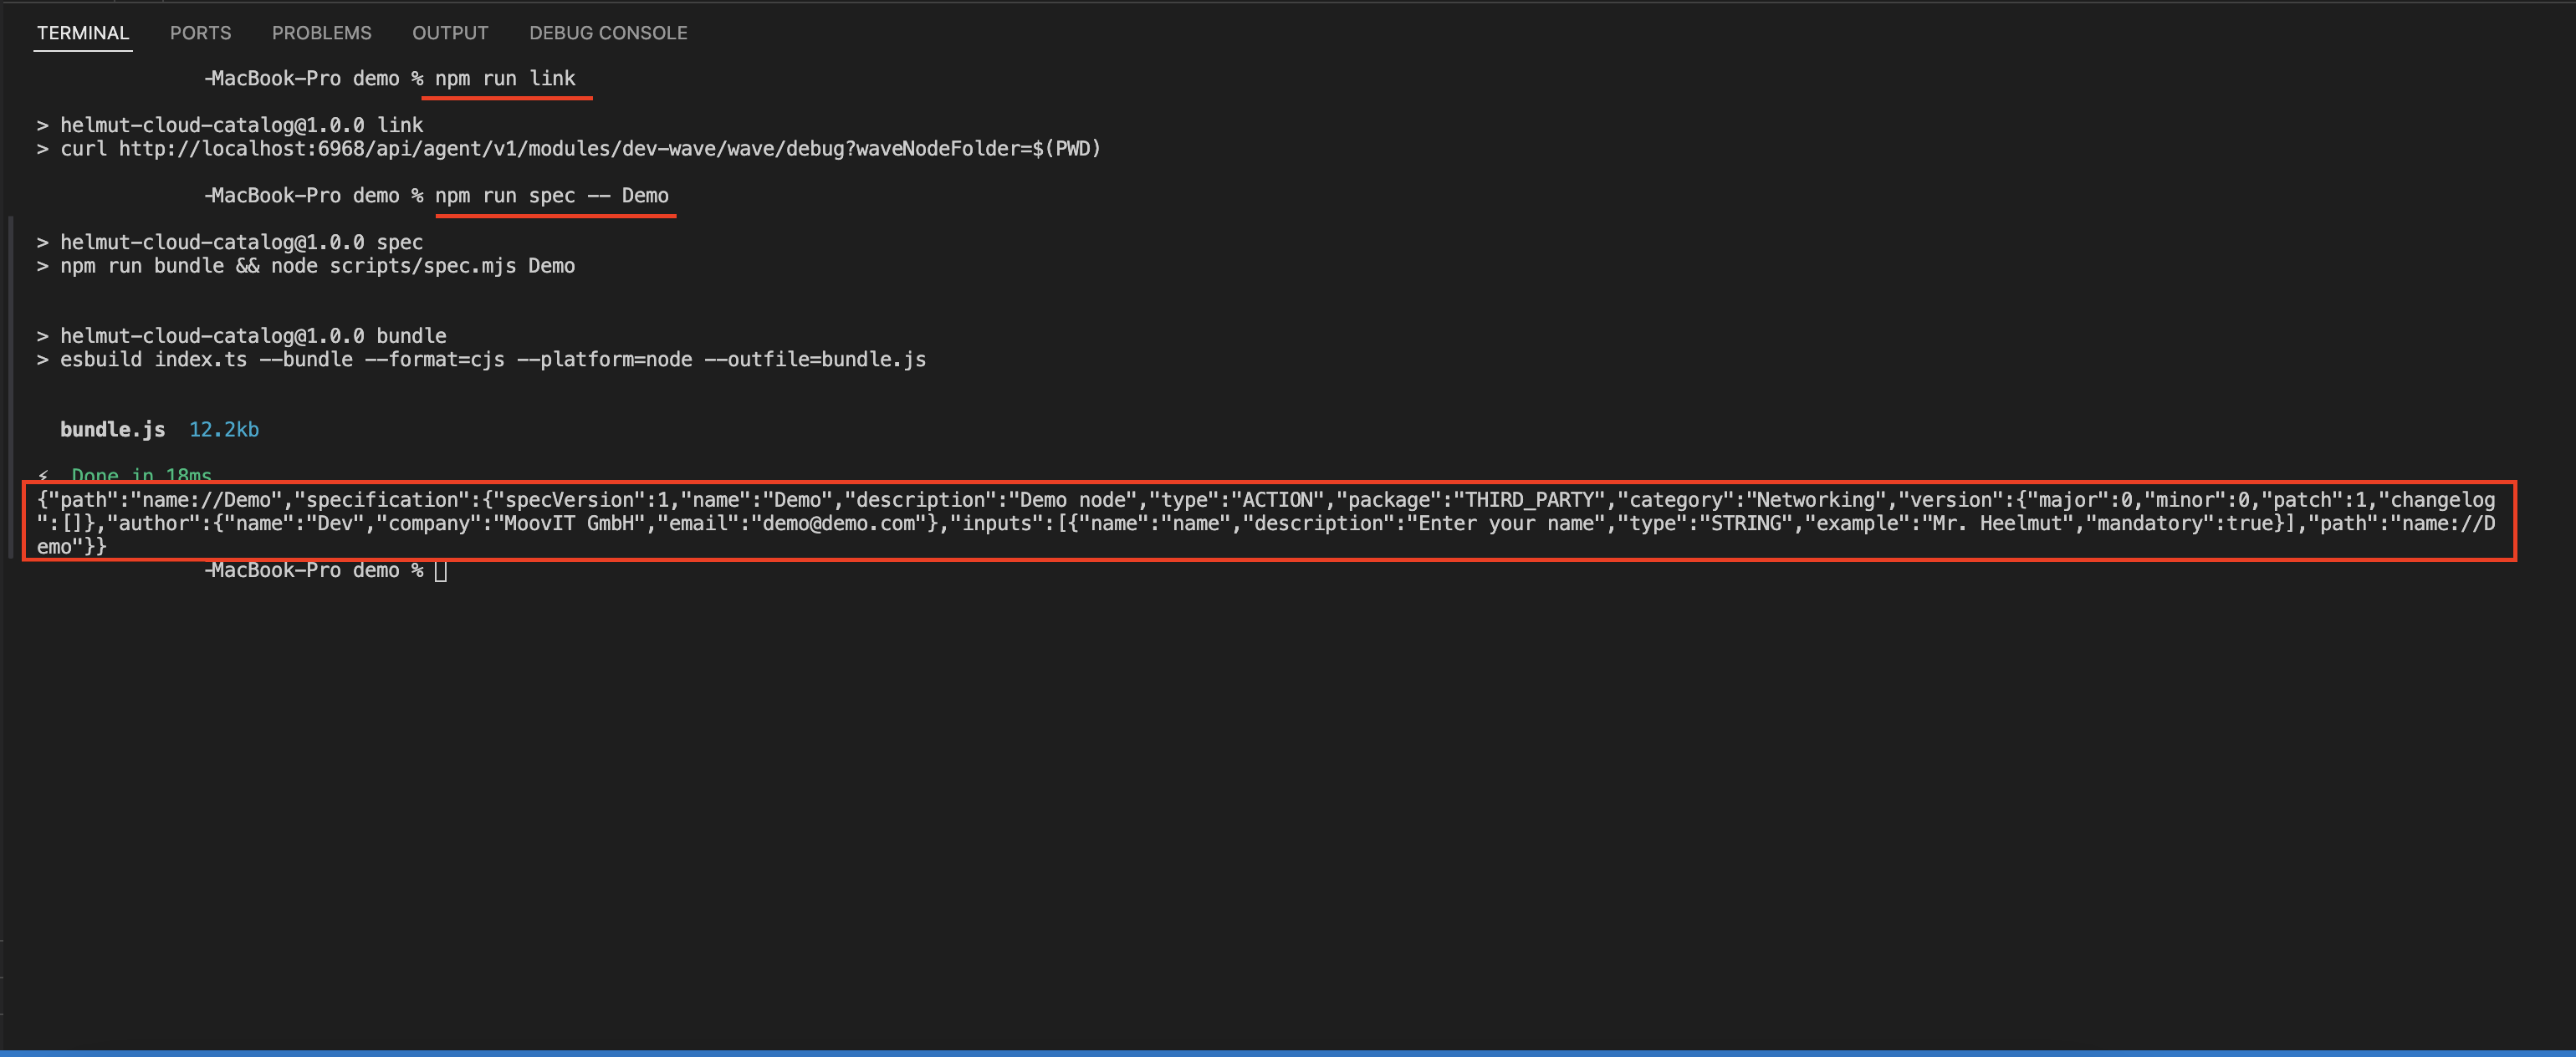
1. Open a terminal in VSCode and run: `npm i`
2. Next, link your node to the helmut.cloud agent by running:: `npm run link` . This command automatically links the helmut.cloud agent to the local file path where your node code lives on your local machine.
3. Finally, generate the specification for your node by running:: `npm run spec -- ` . This will output the full spec for your node directly in the terminal.
3. Copy the JSON output, hop over to the Stream Designer Studio. Press`Ctrl + K` (Windows) or `Cmd + K` (Mac) to bring up the command palette. Type ‘**Import node specification**’ into the search bar, select the option, and press `Return` to open it.
4. Paste the JSON into the input field of the **'Import dev node specification**' window and press `Return`. The node will be added to your canvas, ready for testing.
### 4 Debugging your node's code:
Found a bug or just want to step through your code? We've got you covered!
1. Start by opening a JavaScript Debug Terminal in VSCode.
2. If the helmut.cloud agent is running, stop it first, then run `npm run debug` to launch it in debug mode.
3. Then, run `npm run link` to link your [helmut.cloud](http://helmut.cloud) agent to your local node file path.
4. Set one or more breakpoints in your code where you want execution to pause.
5. Execute the stream, and the debugger will stop at your breakpoints, allowing you to inspect and step through your node code.
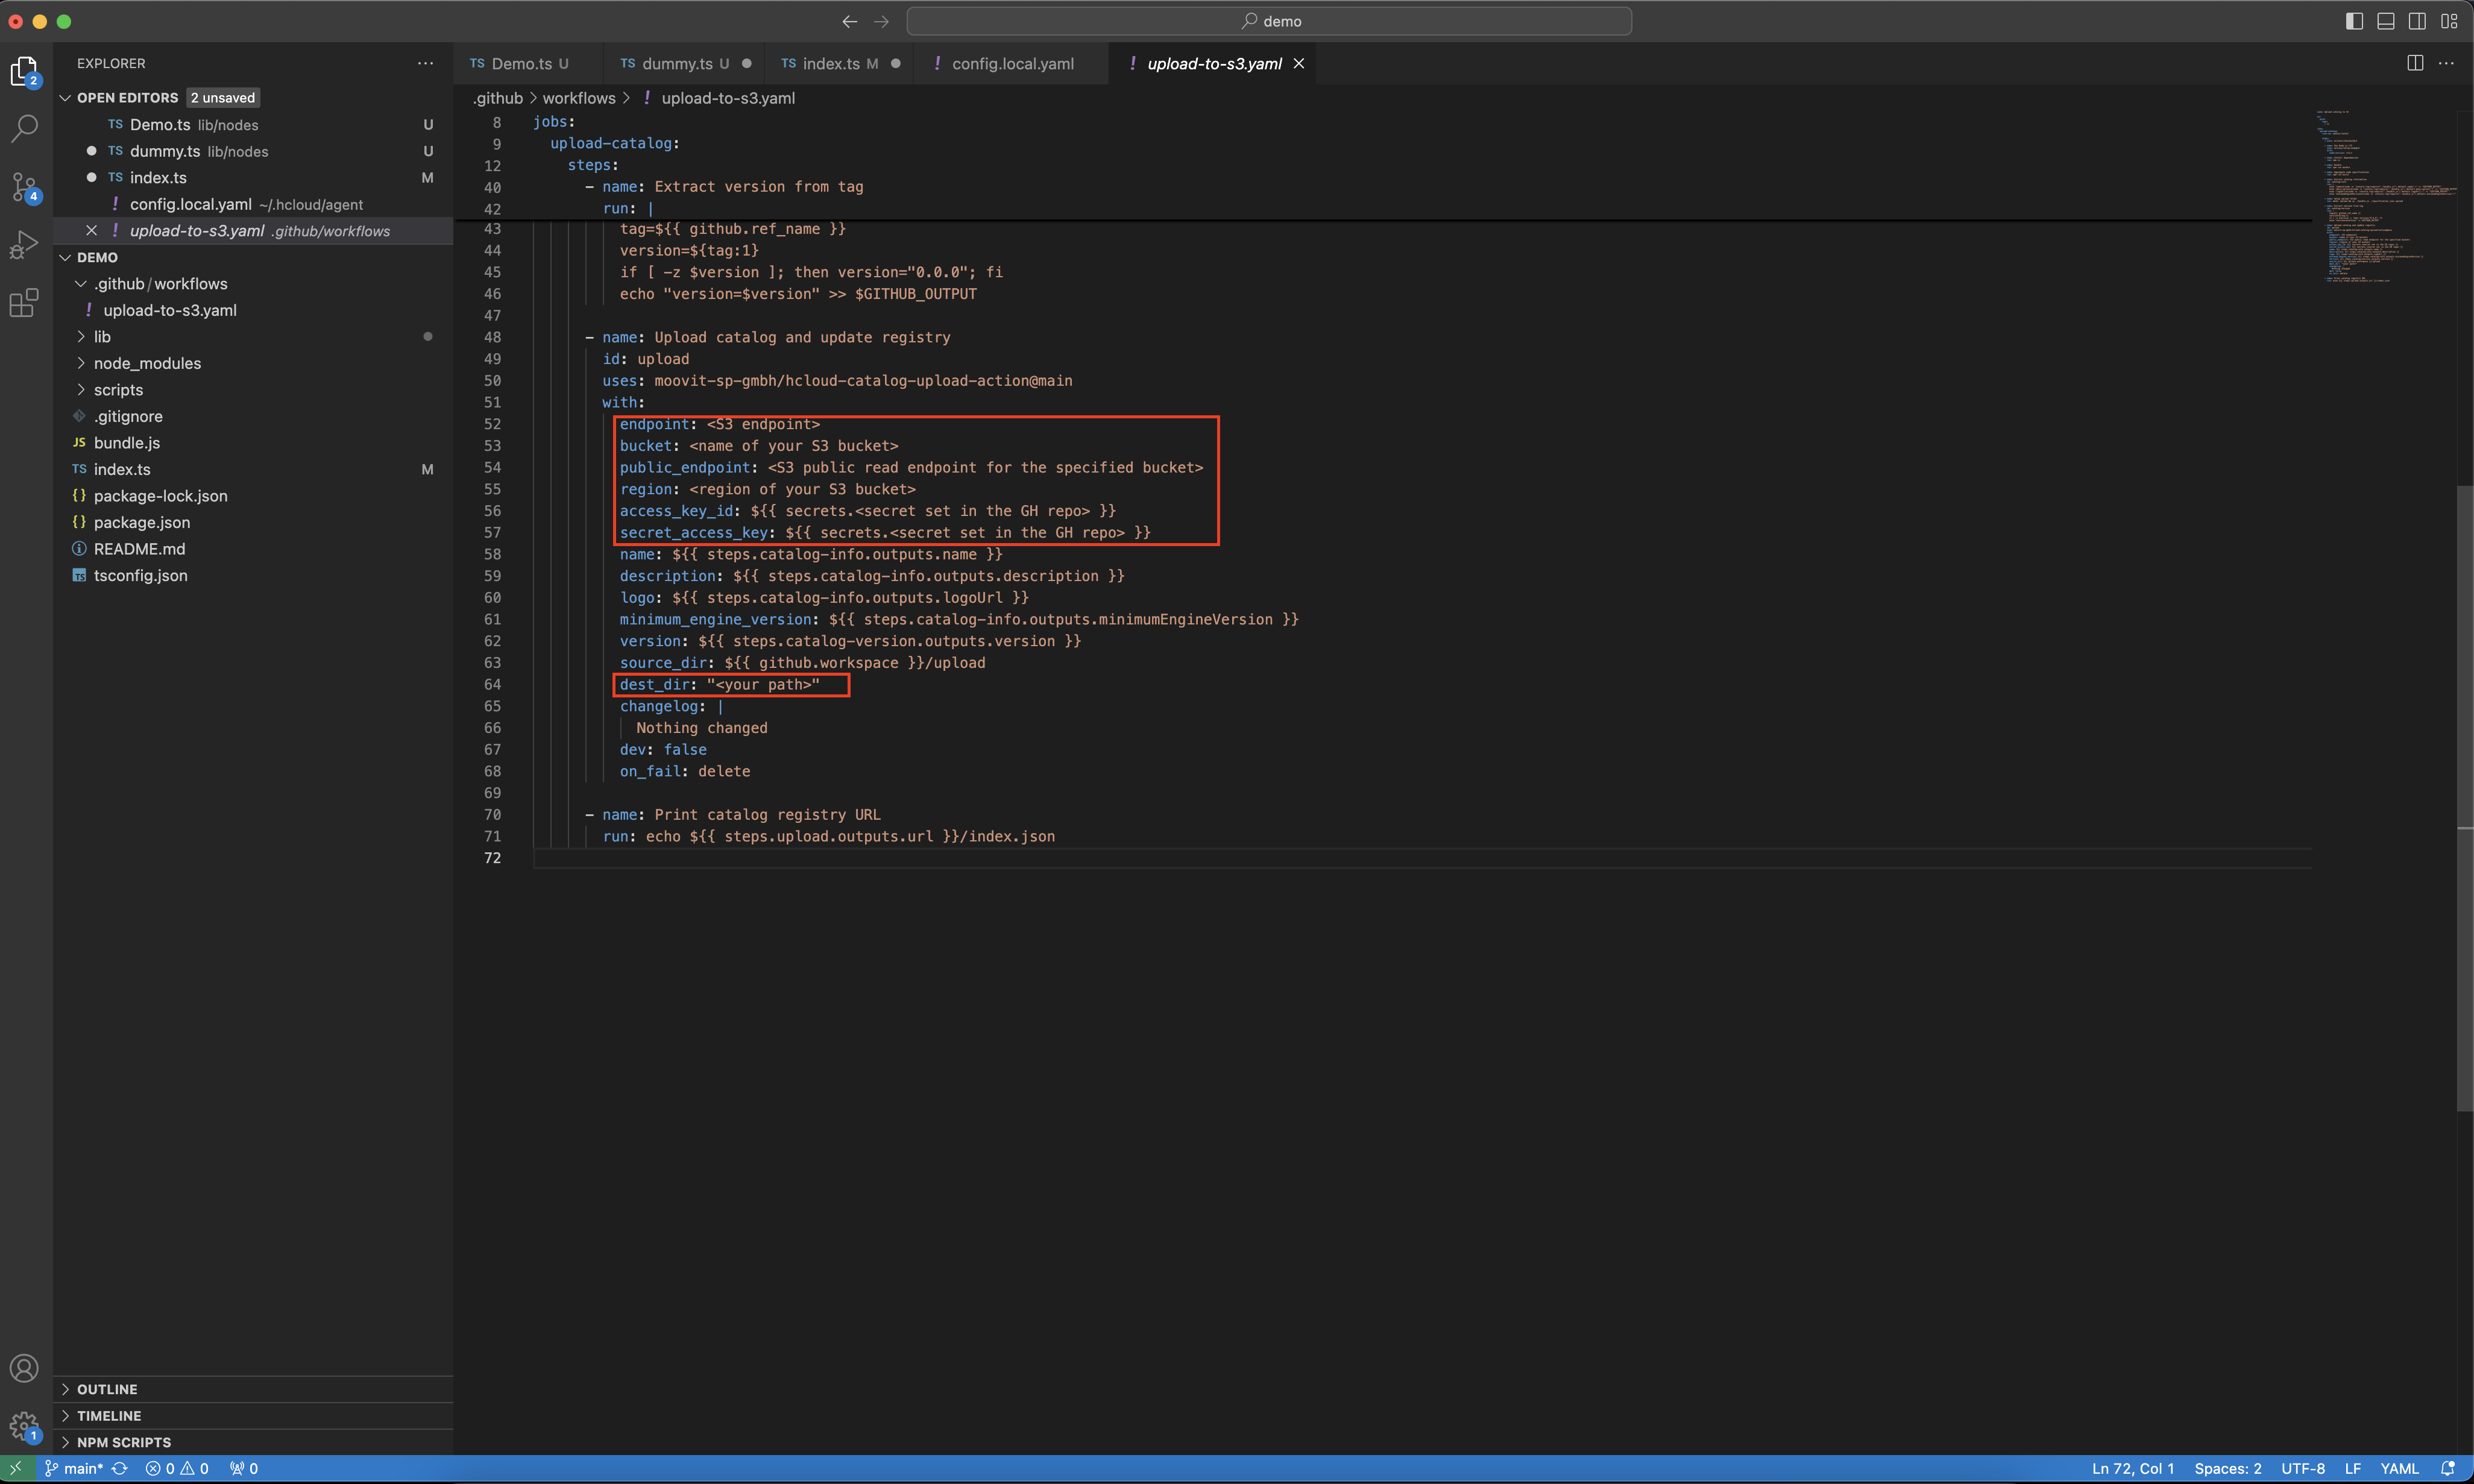
### 5. Configure the s3 storage:
The repo comes pre-configured with a GitHub Action that automates building and publishing your node catalog to S3 storage. You'll just need to configure a few properties:
* **S3 Bucket Endpoint**: The endpoint of your S3 bucket.
* **Bucket Name**: The name of your S3 bucket.
* **Public Endpoint**: The public URL where your S3 bucket is accessible.
* **Region**: The region where your S3 bucket is hosted.
* **Access Key ID**: Your S3 access key ID.
* **Access Key Secret**: The secret associated with your access key.
* **Destination Directory**: The folder on your S3 bucket where the node catalog will be stored.
### 6. Deploy
Now that your node is ready, it’s time to push it!
1. Open your terminal in VS Code and stage your changes with: `git add .`
2. Commit your changes with: `git commit -a -m "commit message"`
3. Tag your release: `git tag vx.x.x`
4. Finally, push your local commits: `git push origin vx.x.x`
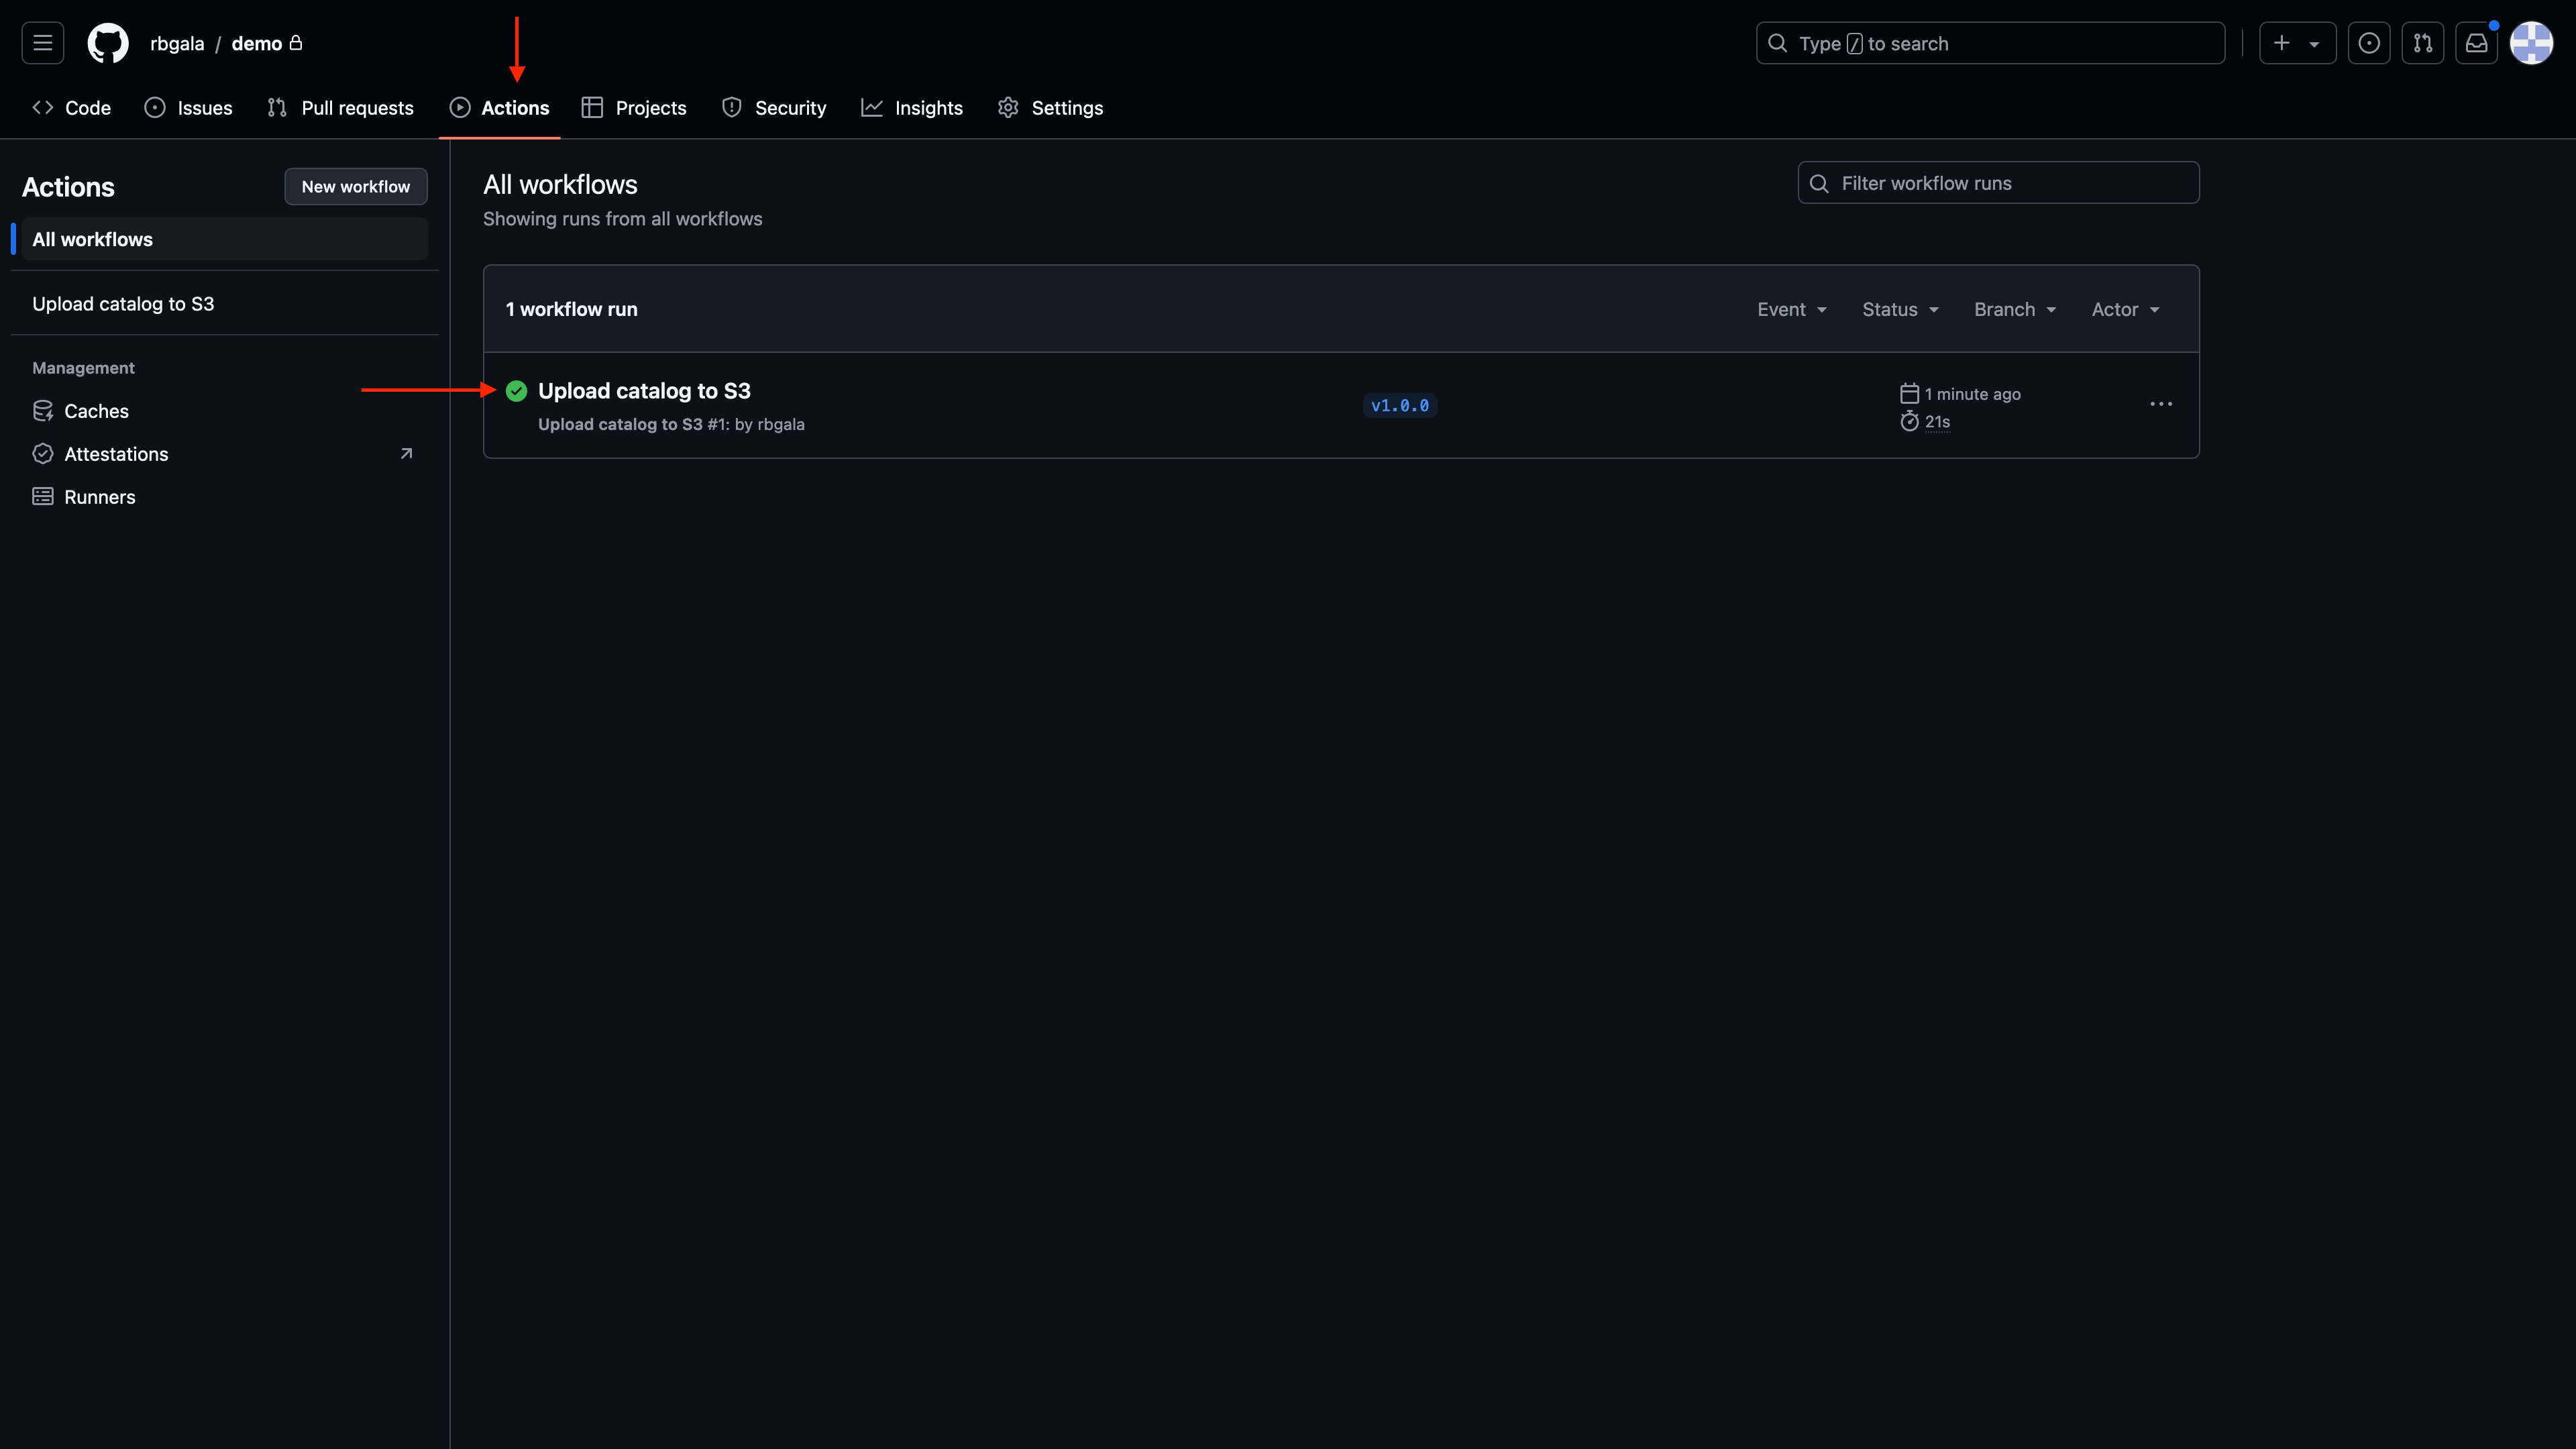
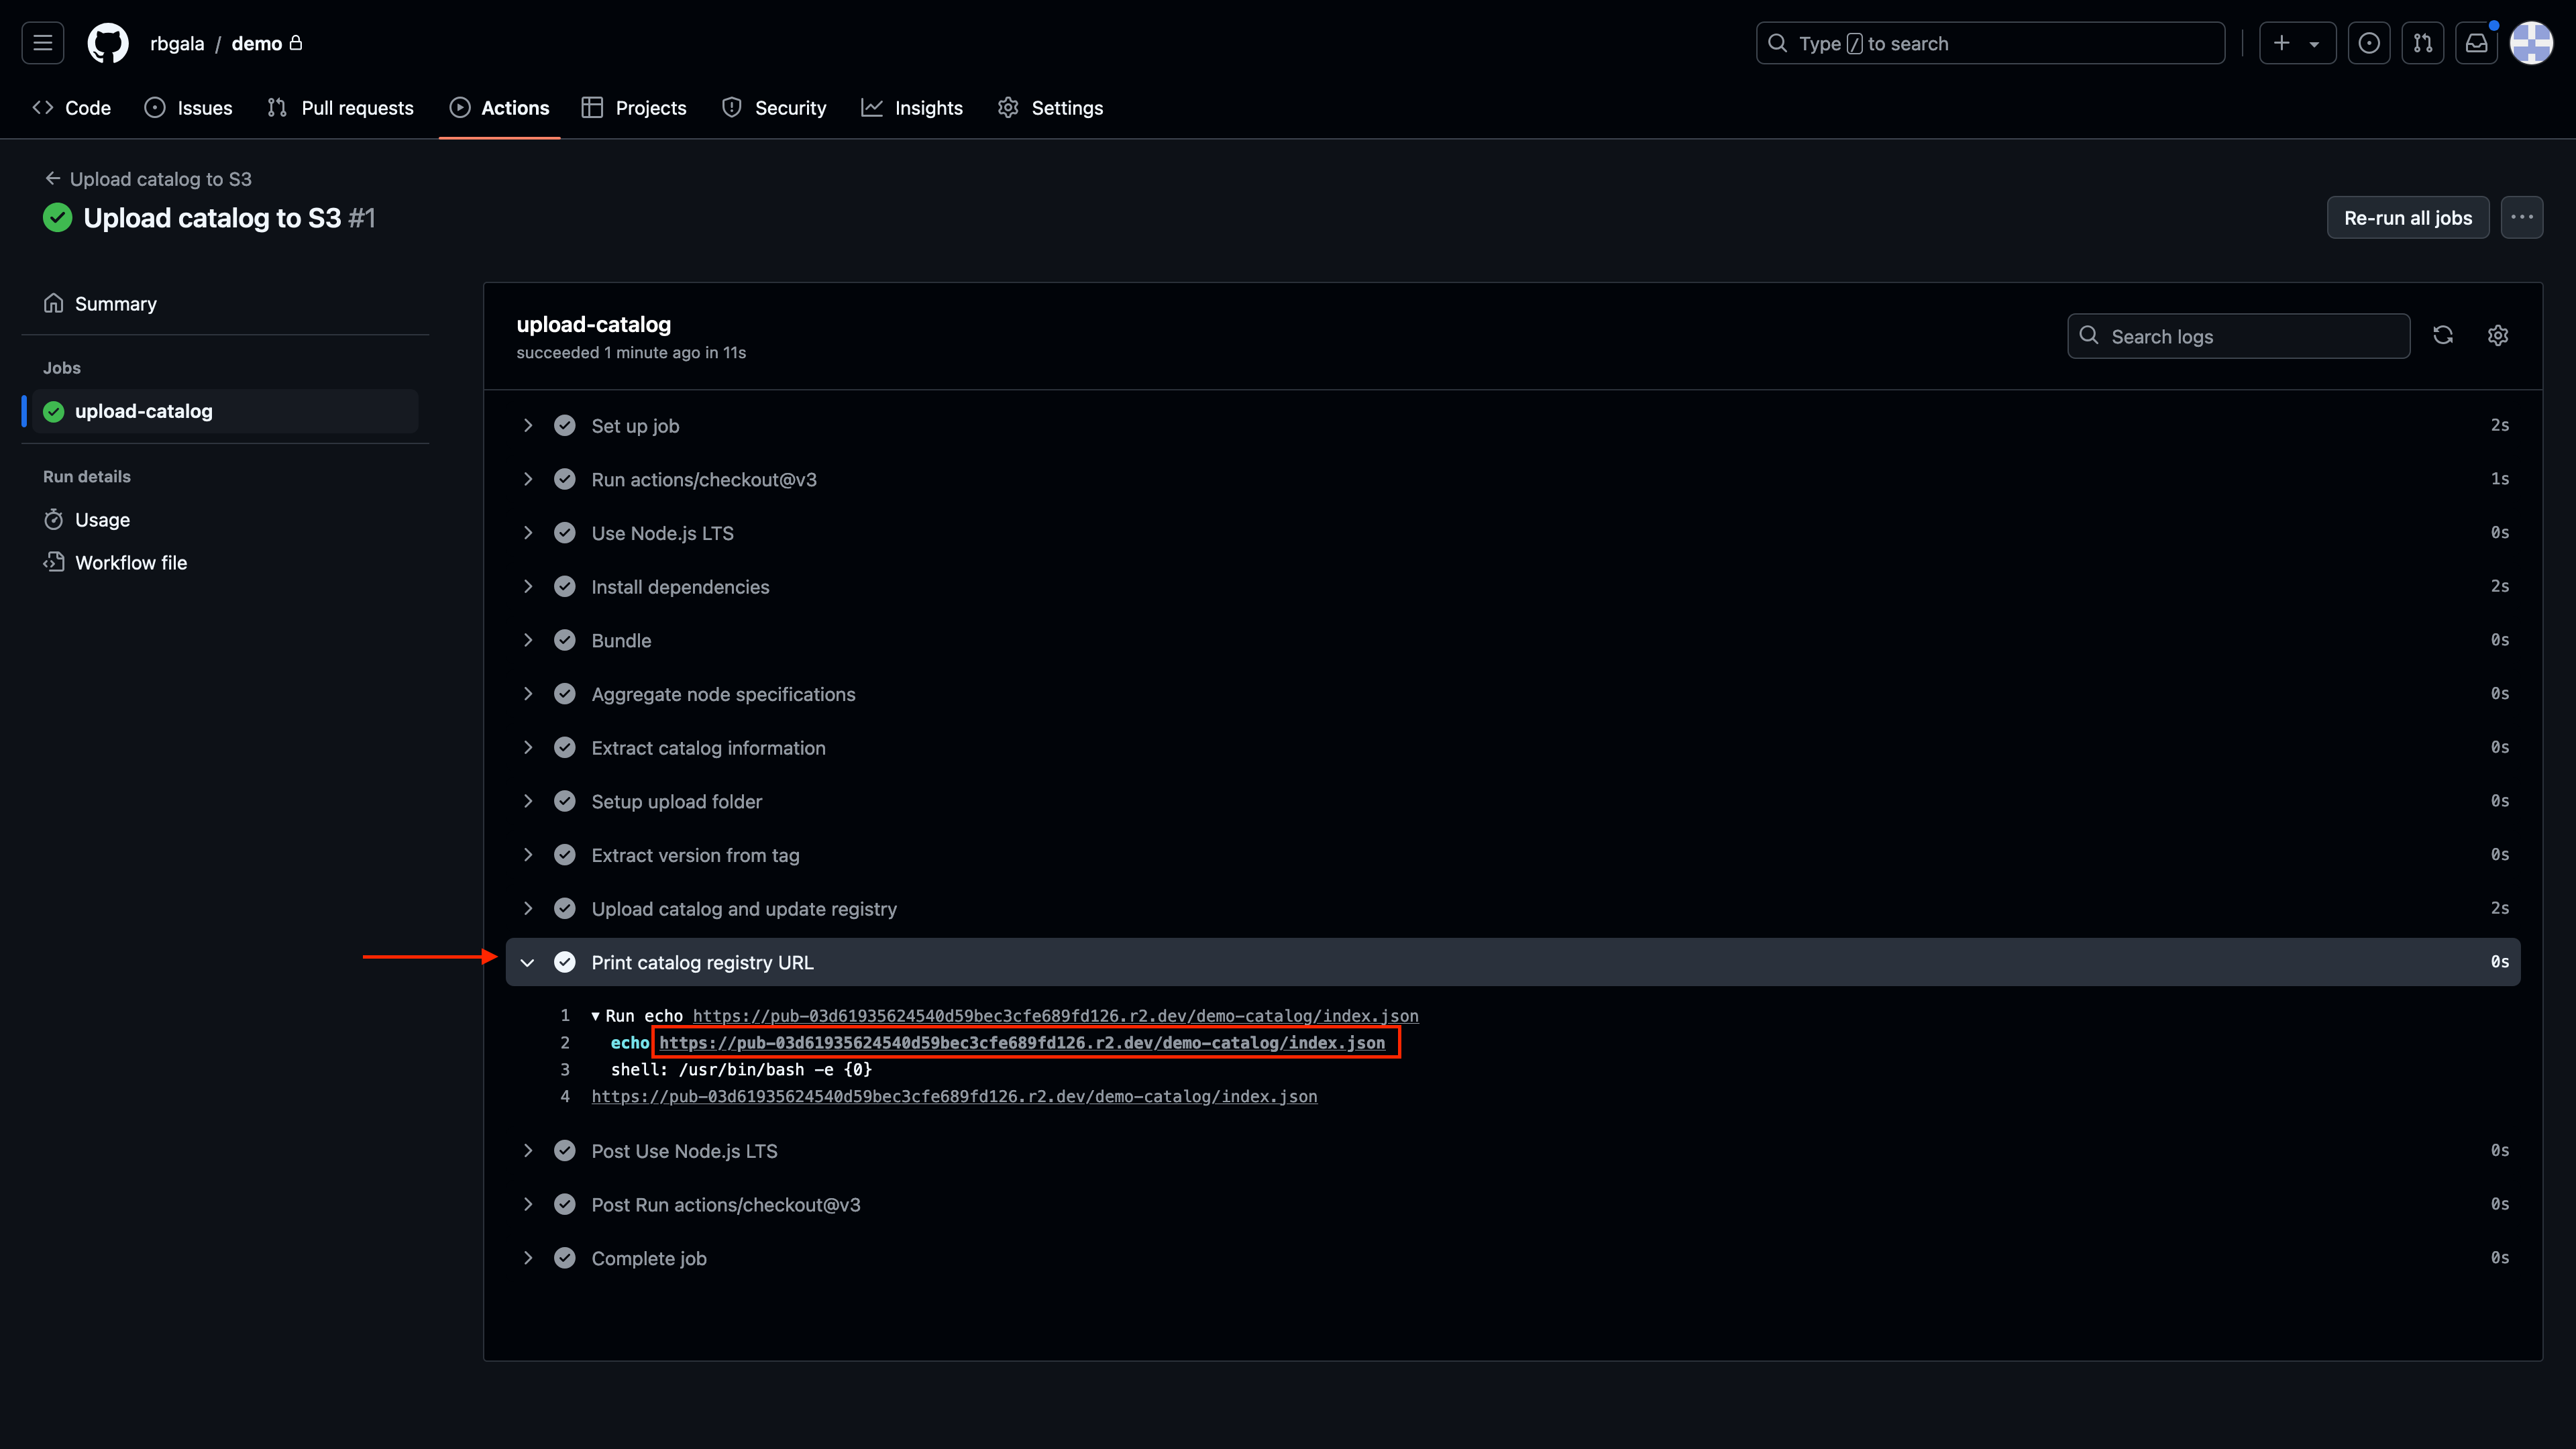
Once pushed head to GitHub, open the "**Actions**" tab, and expand the "***Upload catalog to S3***" workflow
Expand the "**Print catalog registry URL**" section and copy the URL
### 7. Import the node catalog in Stream Designer Studio:
Now that your catalog is built and you’ve got the public URL, it’s time to import it into Stream Designer Studio.
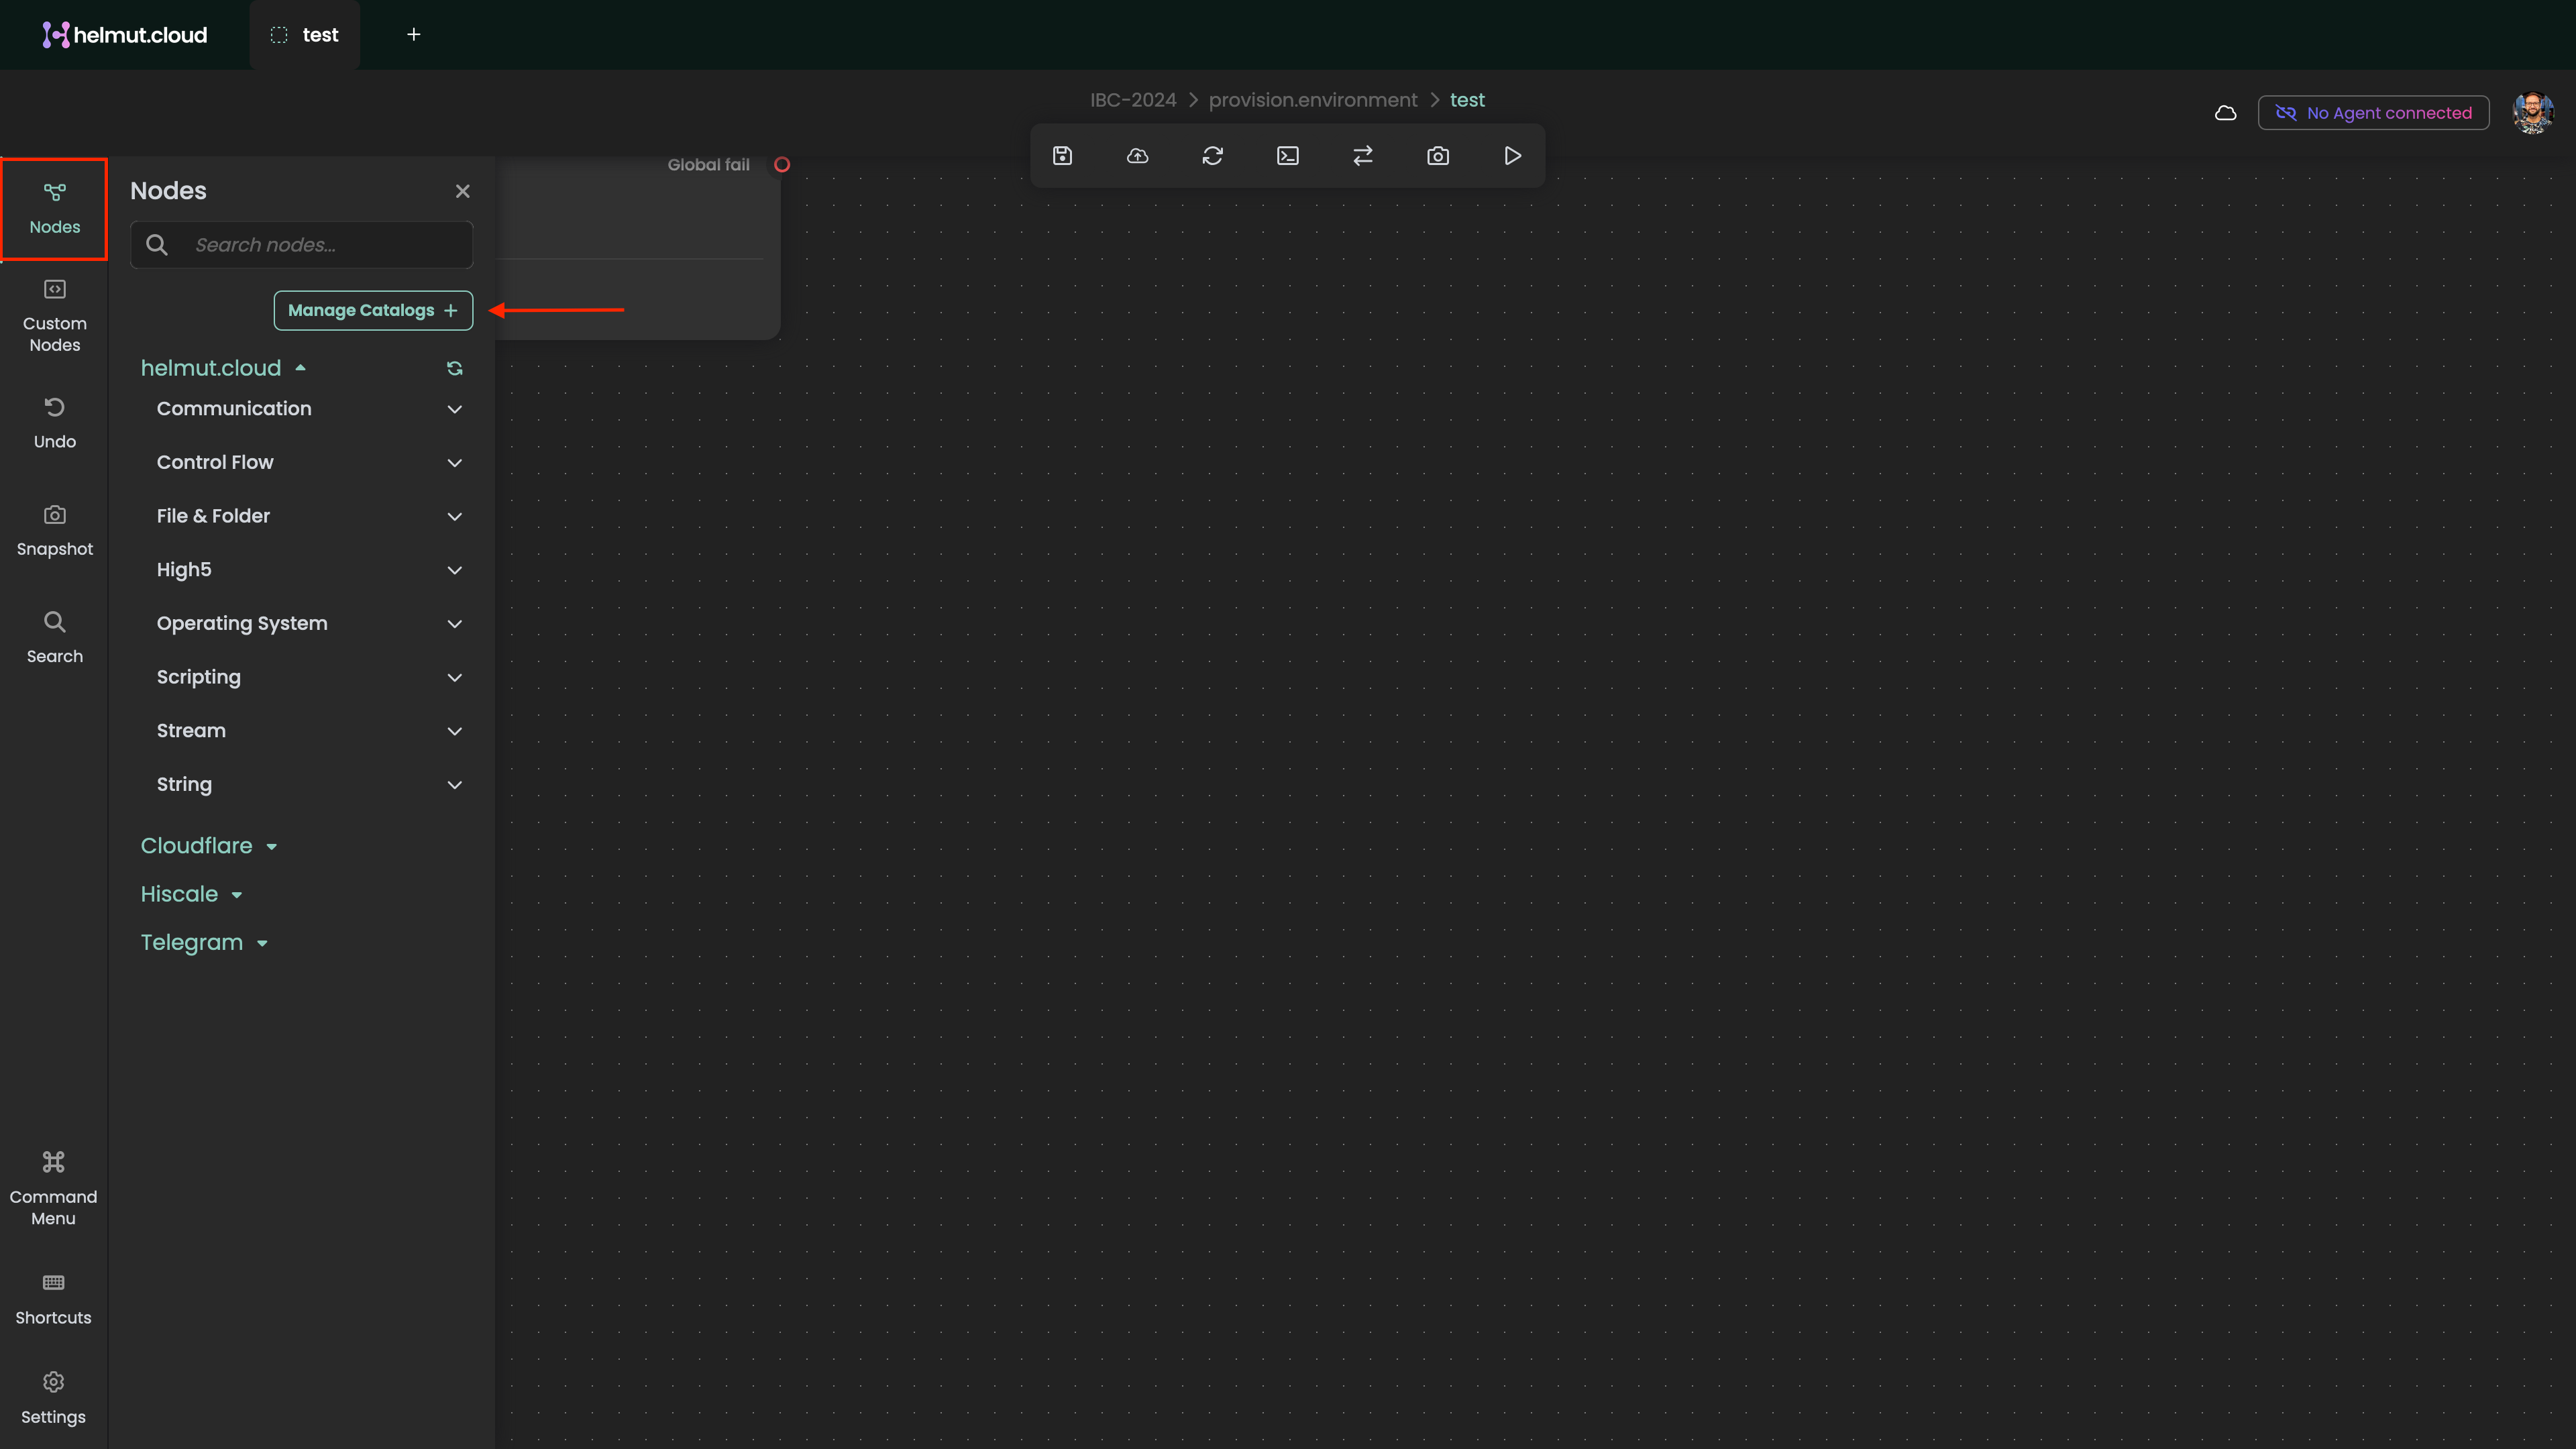
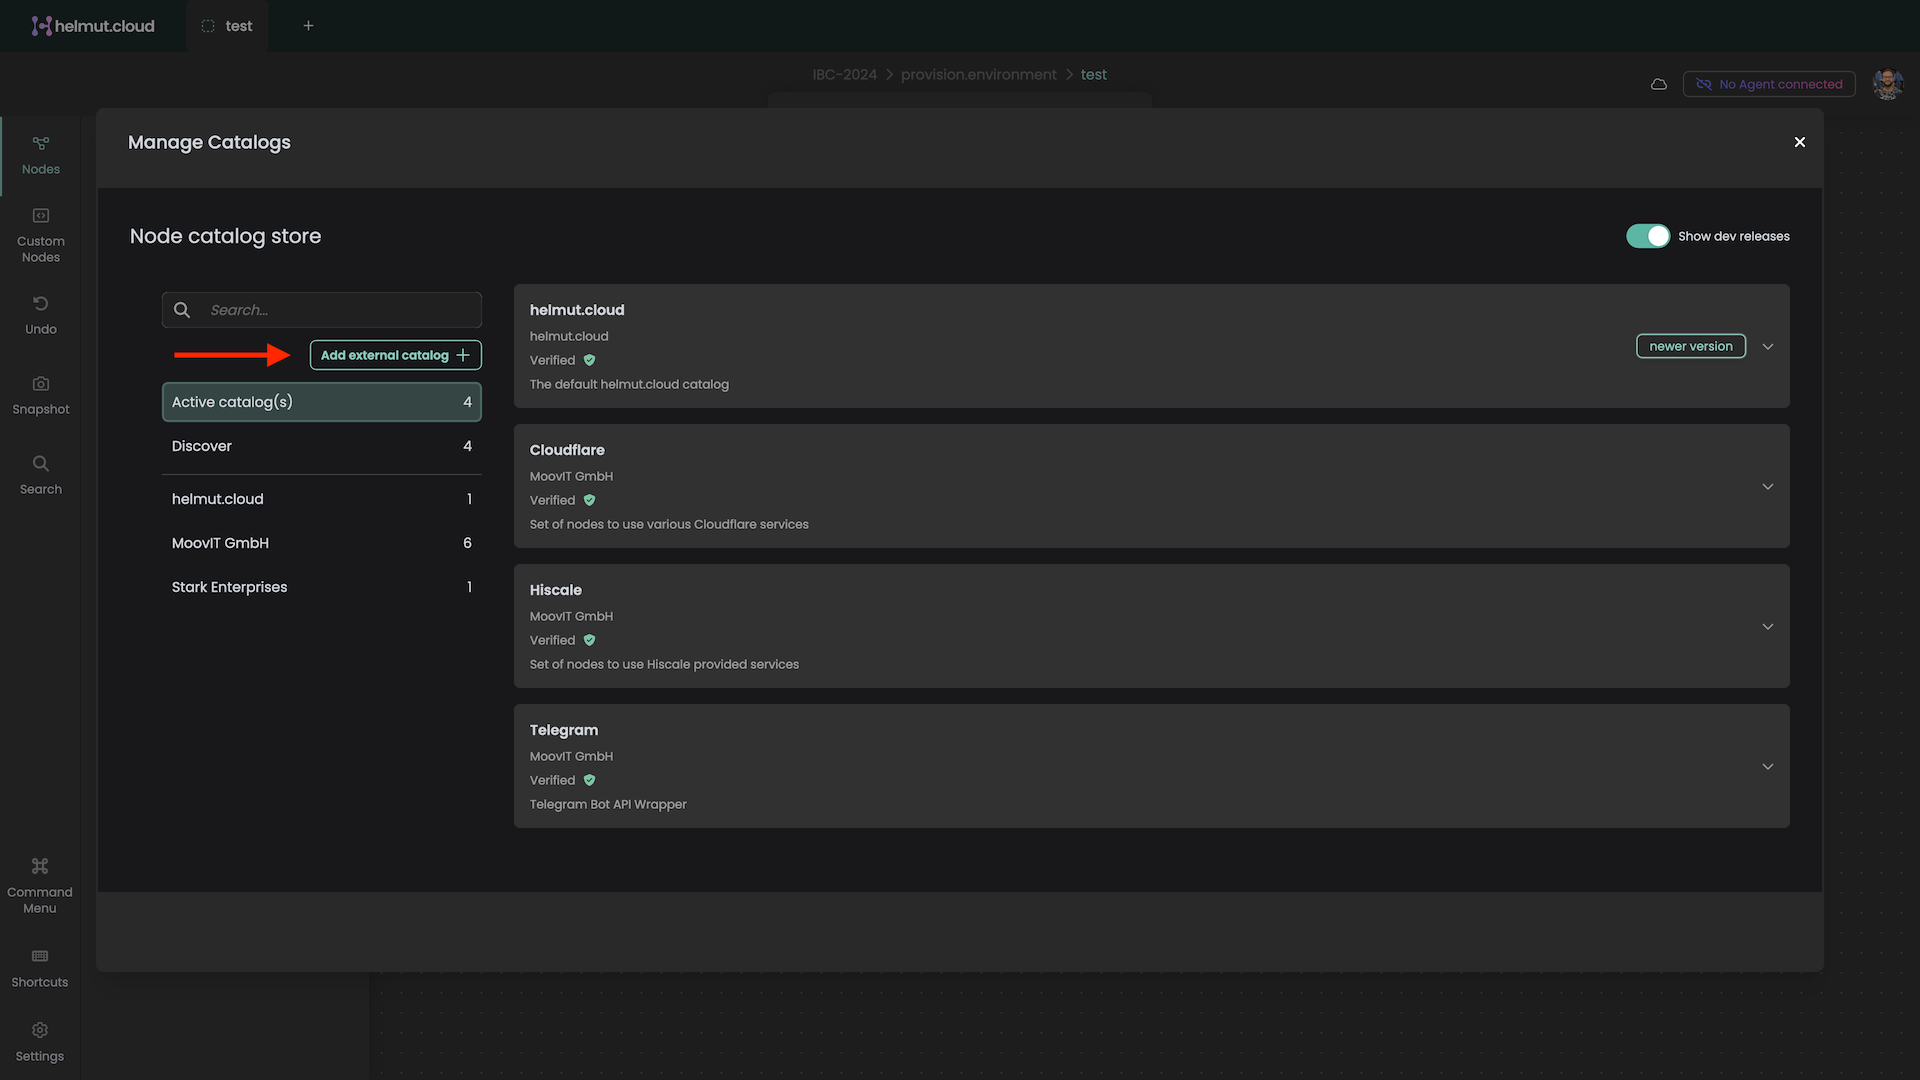
1. Go to the node panel, click "**Manage node catalogs**"
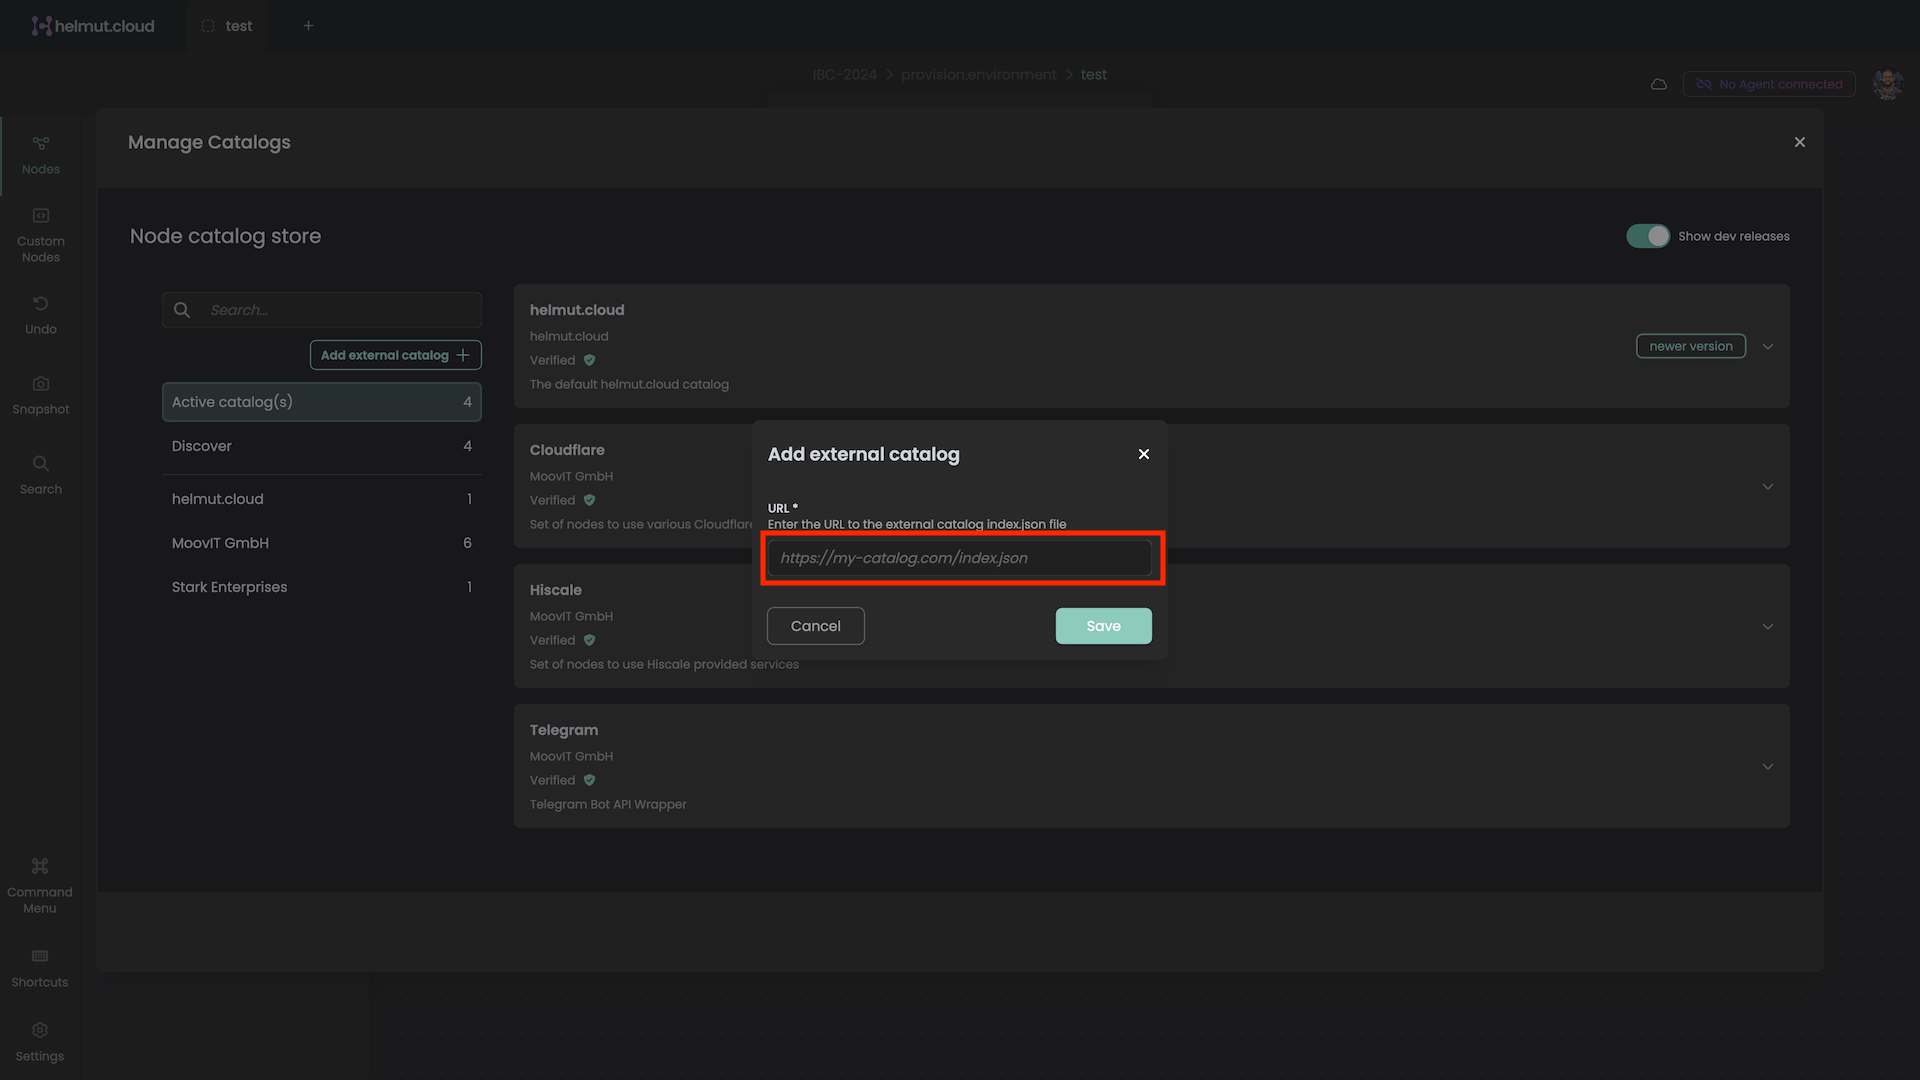
2. On the "**Manage node catalog**" screen, click "**Add external catalog**"
3. Paste the URL, and hit "**`Save`**"
Congratulations! 🎉 You've now successfully developed, tested, built, and published your node catalog!